So the whole school run thing is exhausting. Not for the kids. For me. I had no idea how disorganised I was until I actually had to be somewhere for fear of incurring the wrath of the headmistress. I’ve had proper jobs pre children, but they were all in advertising where you do have to turn up for work at some point in the morning, but there’s no bell, no clocking in and out. And well, it was all very civilised and expected that if you rocked up late you worked later. Scrap that, we all worked late anyway. We laughed in the face of a 50 hour week.
So now I am being brought back to school rules and regimes as my eldest son has started school. And I find myself craving nursery cakes, the kind we mums produce for children as a treat when really we’re smuggling fruit and wholemeal stuff into their little bodies.
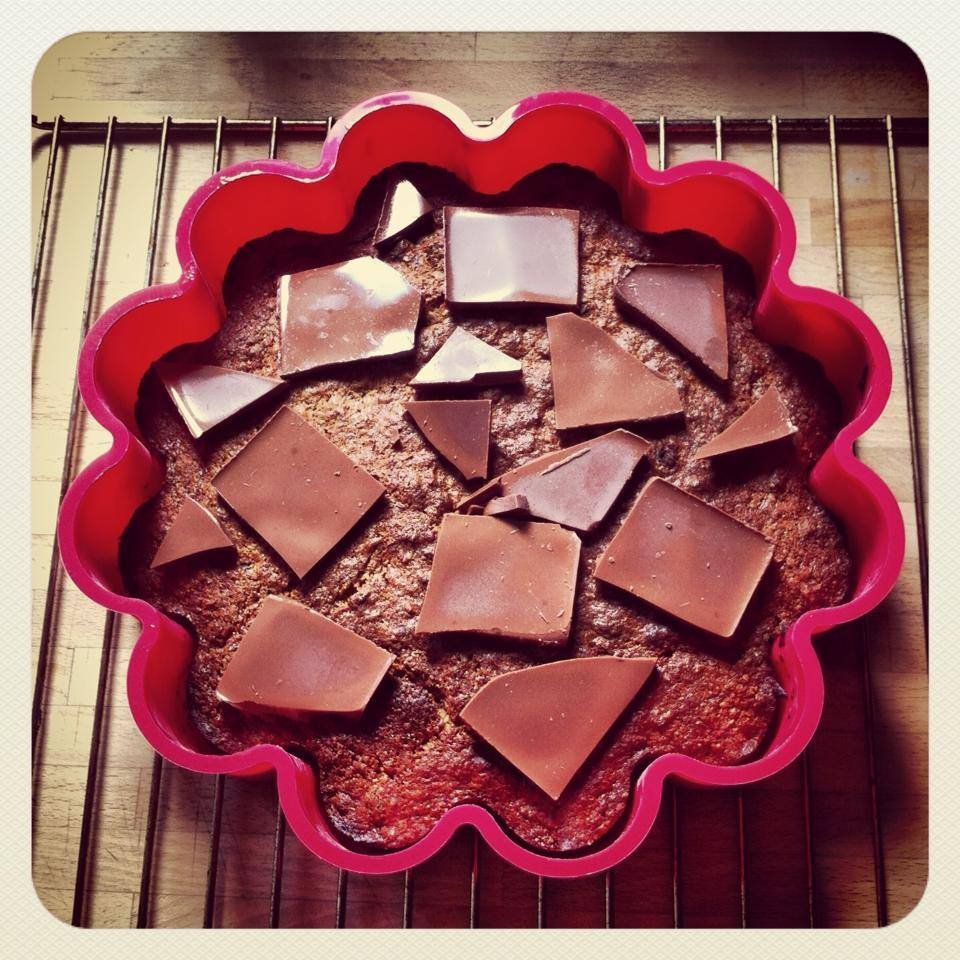
Criminally easy. Preheat the oven to gas mark 4/180C and grease and line a cake tin – I used a 22cm wide one but anything will do. Cream the butter and sugar until light and creamy then add the eggs, a little at a time, beating well after each addition. If the mixture curdles just add a tbsp of flour. Then beat in the bananas next, then beat in the flour, baking powder and raisins for a minute or so. Spoon into the tin and level with a spoon. Bake for 40 – 60 minutes until a skewer comes out of the middle of the cake clean. The larger the diameter of the tin the shorter the cooking time as a rule.
Whilst still warm break the chocolate over the top and leave to melt into the cake as a cheat’s icing. Enjoy after school with tired limbs and a brain full of facts about owls and worms.
My son has his first taster session at school today. He’s not even worried about it. He skipped into playschool this morning and announced he was going to see HIS new school this afternoon with HIS friends. With these happy, owned, smiley words my selfish heart sank a little as I felt that first major stretch of the cord. I can feel it thinning.
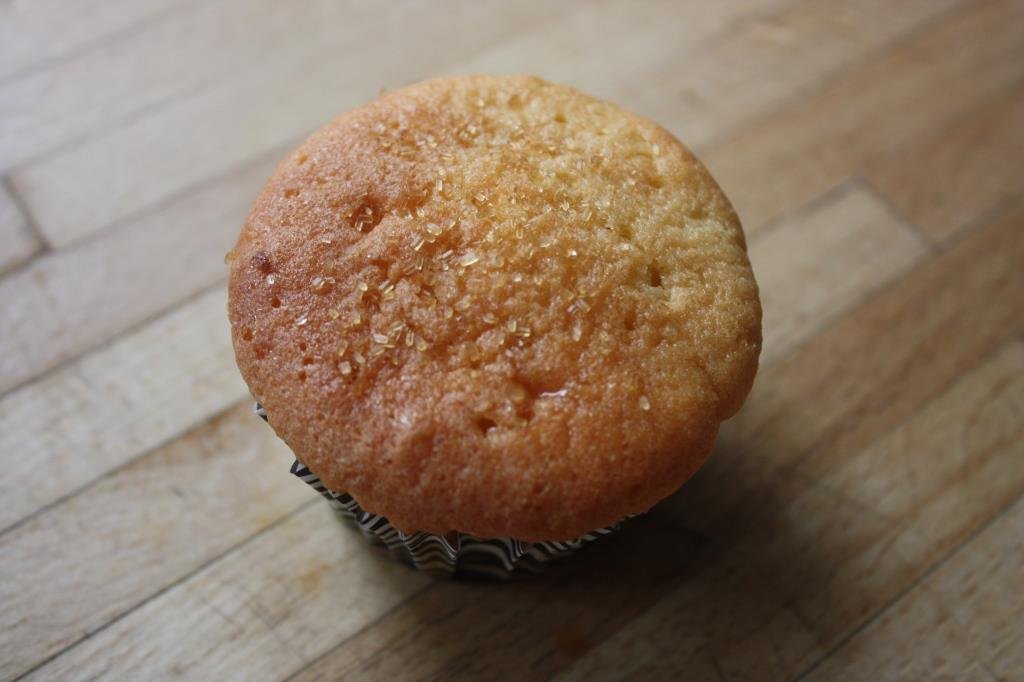
I remember the drive home from the hospital, less than 5 years ago, with our precious cargo wrapped in sumo layers, strapped in like a mummy. We may have broken 15mph but it’s unlikely. So precious and now oh so grown up. Sigh. Here’s a grown up cupcake that my little 2 year old son really rather likes which leads me to think he too may leave home and grow up one day. Surely not? Add poppy seeds if you have any.
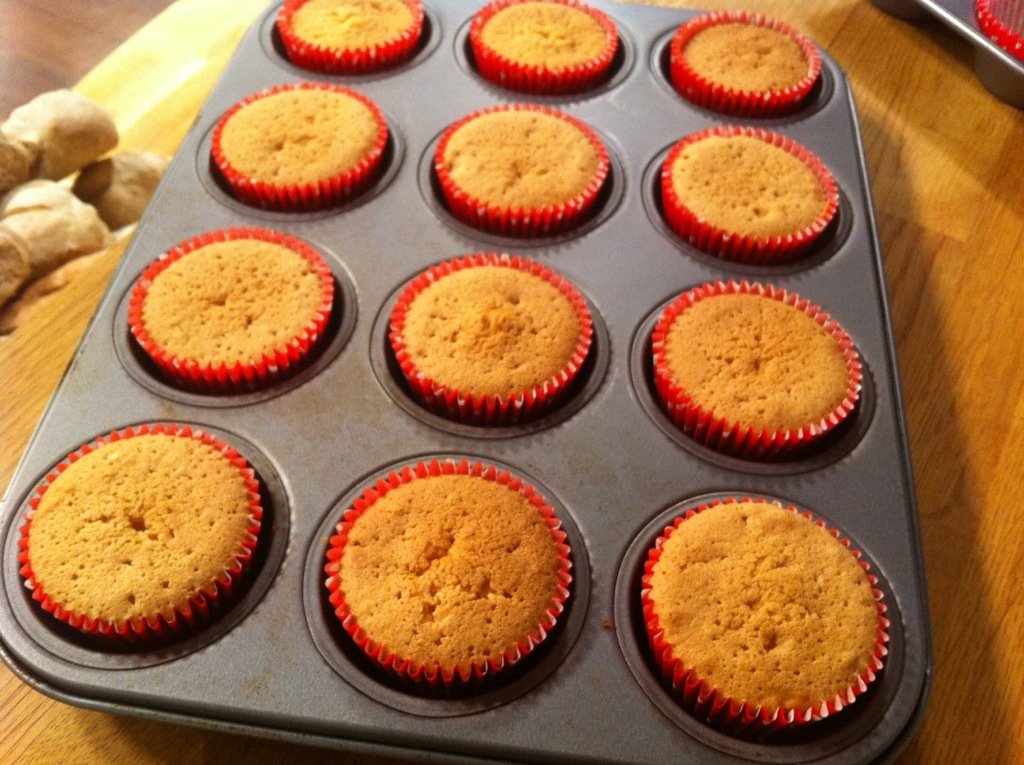
Preheat the oven to 180C/Gas 4 and line a cupcake tray with 12 cases. Beat the flour, castor sugar, butter, milk, eggs, baking powder and zest with a wooden spoon/handheld electric beater/stand mixer until the mixture is lighter than when you started and creamy looking – like beaten double cream. Takes about 4 mins in the stand mixer, about 5 – 6 with the handheld and a little longer with the wooden spoon though it depends how strong you are.
Spoon the batter into the cases and bake for about 20 minutes until well risen and slightly browned. Check that they are baked through by popping a toothpick into the middle of the centre cupcake. If it comes out clean they are done – cool on a wire rack. If not, pop back in the oven for 5 mins and check again.
Once they are out, make the lemon drizzle by heating the juice of the lemon with 3 tbsp castor sugar in a small saucepan on the hob. Once the sugar dissolves and it starts to bubble a little remove from the heat and poke holes into the cupcakes. Then lay some old newspaper/chopping board under the cooling rack the cupcakes are on and carefully spoon the drizzle onto the cupcakes one at time. Once each has been drizzled, top with a little crunchy brown sugar. Leave to cool and serve with grown up tea served with yet more lemon.
I get asked a lot about very few things. One of those things is how I stay so slim which make me chuckle so much I want to reach for a biscuit. Having spent my twenties working in advertising where everyone was stick thin, posh and Oxbridge (silly hybrid word) educated, the very thought that someone might consider ME slim tickles me. For the record I am a size 14 and pretty tall. So yes, I do eat a lot but no, I am not thin or even slim… I am curvy and most of the time pretty happy that way.
The other thing I get asked about is what Paul Hollywood is like. Followed by whether I fancied him. (I didn’t by the way.) The next most popular thing I get asked is what nozzle I used for various icing related projects. It’s almost always a Wilton 1M for no other reason that I am lazy and all my icing paraphernalia is kept in the spare bedroom. The size 14 bottom and my choice of nozzle are oddly interlinked then you see.
Lastly I get asked a lot about how to achieve a perfectly flat cupcake. I’m not sure why as I’ve never had an issue with peaked cupcakes myself. They look cute and if you want them flat you snip the top off with a pair of scissors and gobble the offending peak up. Again, related to my size 14 bottom.
Preheat the oven to 170C/Gas 3 and make sure a rack is in the centre of the oven. Line a 12 hole cupcake tin with cases. Mix all the ingredients together until lighter in colour than when you started and creamy looking. This takes about 4 minutes in a KitchenAid mixer with the flat beater (start on 1 and work up to 6) or about 10 minutes by hand with a wooden spoon. Fill each case only half full and do not be tempted to use up extra batter by over filling the cases – that’s how the domes happen.
Bake for 20 – 25 minutes until just browning and a toothpick comes out of the centre of the middle cupcakes clean. Remove from the oven and from the tin and cool on a wire rack. If you have any mixture leftover bake some more cupcakes! Despite having baking powder in it this mixture will be fine to sit about unbaked for 20ish minutes.
If you still have domes then I would suggest you buy an oven thermometer as baking at a lower temperature is key to achieving a flat cupcake. (As is not overfilling.) Also, try to bake in the middle of the oven. If you bake on a higher rack the oven is usually hotter, again resulting in a peaked cupcake.
Was there a name you wanted as a child? I was always drawn to the letter C. For a long time I wanted to honour my Irish roots and be a Caitlin. I wasn’t even sure how to pronounce it but that didn’t trouble me, I’d work it out. I could handle not knowing how to pronounce my name, because I’d be all willowy and Irish and interesting if I were called Caitlin. Then I discovered Nirvana and decided Courtney was the name I really needed. Along with a propensity to wear baby doll dresses, sport bleached hair with black roots and hang a baby called Frances Bean from my hip.
I was mighty excited when just over a year ago I met a lady called Caitlin. She was every bit as exciting as I thought she might be and she has Irish roots and she’s fabulous. This is a cake just for her as she’s rather partial to rosy cakes and drinks. I made another version of this cake recently. You could say her addiction has passed to me.
25g freeze dried raspberries (I got mine from Sainsbury’s but can also order online.)
Preheat the oven to 180C/gas mark 4 and check the rack is in the middle of the oven. Grease and line 2 x 20cm (ish) tins. If yours are larger simply decrease the baking time a little, if smaller increase it. This is all about the thickness of the cake – the thicker it is (in height) the longer it takes to bake.
Cream the butter and sugar together in your stand mixer/with an electric mixer/with a wooden spoon until really light and creamy looking. Then add the eggs a dribble at a time, beating well after every dribble. Add the vanilla extract and do the same. Then sieve the flour, baking powder and bicarb together and fold through the cake mixture. Split the batter equally between the two tins, level with a spoon and then bake for about 20 minutes or until well risen, golden brown and a toothpick comes from the centre of the cakes clean. The cake should also be shrinking away from the sides of the tins a little. If you are baking each cake on a different rack don’t forget the higher the cake the quicker it will bake. Either rotate or whip the top one out earlier.
Remove from the tins and cool on a wire rack as soon as your hands can handle it. Then decorate with rose buttercream which you can find the recipe for here. If you don’t have a stand mixer then beat your butter with a wooden spoon/electric handheld mixer and then add a tablespoon of the icing sugar at a time, beating until the mixture looks like mousse. Add rose water to taste. Decorate with freeze dried raspberries.
Yesterday I was on QVC again talking about the wonder that is Kitchenaid. The ‘theme’ of the show was versatility I try and theme each show but I do wonder whether this is just for my own personal amusement or if it’s any help at all. Having spent more time blogging and on social networks that I have on TV I still find the whole one sided process of TV alien. There’s rarely real time feedback from the viewer. Yesterday a lovely lady called in – it made my day! But of the thousands who watch you just don’t know what they’re all thinking. That is until you post the pictures of what you’ve made on Facebook and some kind soul tells you your ice-cream cake looks like mushrooms. Honesty can be overrated.
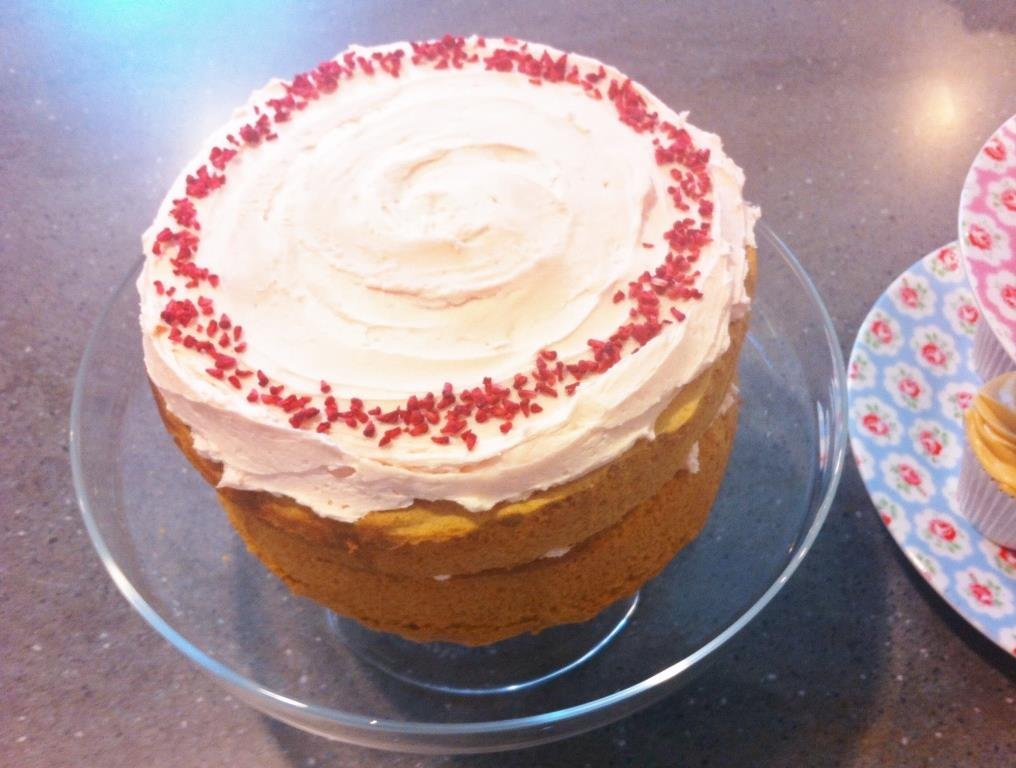
Anyway, here’s a very simple recipe for a Victoria sponge cake and then five ways you can dress her up or down. Think of her as your little black dress of a cake. And if you do try the cherry Bakewell ice-cream version then I assure you, the filling does not in any way taste like fungi like.
All comments gratefully received. I love reading them.
Mix all the ingredients together using the flat beater until light and creamy – takes about 4 minutes and should look like whipped double cream when done. Pour into two greased and lined round tins and bake in a preheated oven at 180C/Gas 4 for 20 – 25 minutes until well risen and golden brown. A toothpick should come out of the centre clean when done. Cool on a wire rack and remove from the tins once you’re able to stand the heat.
Way no. 1 – Traditional buttercream filling with sweeties on top
200g soft salted butter
400g icing sugar
2 tbsp vanilla extract
Use the flat beater to cream the butter until soft and light – about 4 minutes. Then add the icing sugar spoon by spoon, mixing on a low speed until all incorporated, add the extract. Then beat on high for 7 minutes until the buttercream looks like mousse – flecked with air bubbles, then use to sandwich the cakes together. Place more buttercream on the top and add sweeties! I used Smarties and a plain tipped open nozzle to pipe the centre and topping. Oh and a couple of tablespoons of jam looks and tastes great too.
Way no. 2 – Cherry Bakewell ice-cream cake
3 tablespoons cherry conserve
A jar of morello cherries, drained
3 scoops vanilla ice-cream
5 heaped tablespooons icing sugar
Lemon juice
50g toasted almonds
Add a teaspoon of almond extract to the cake mixture if you wish. Take the morello cherries and mix through the ice-cream with the flat beater – then pop back in the freezer to re-solidify. Spread the cake with the cherry conserve then add the ice-cream carefully. Add the second layer of cake and then mix the icing sugar with a little lemon juice to a stiff paste and pour over the cake. Cover with flaked almonds and serve immediately!
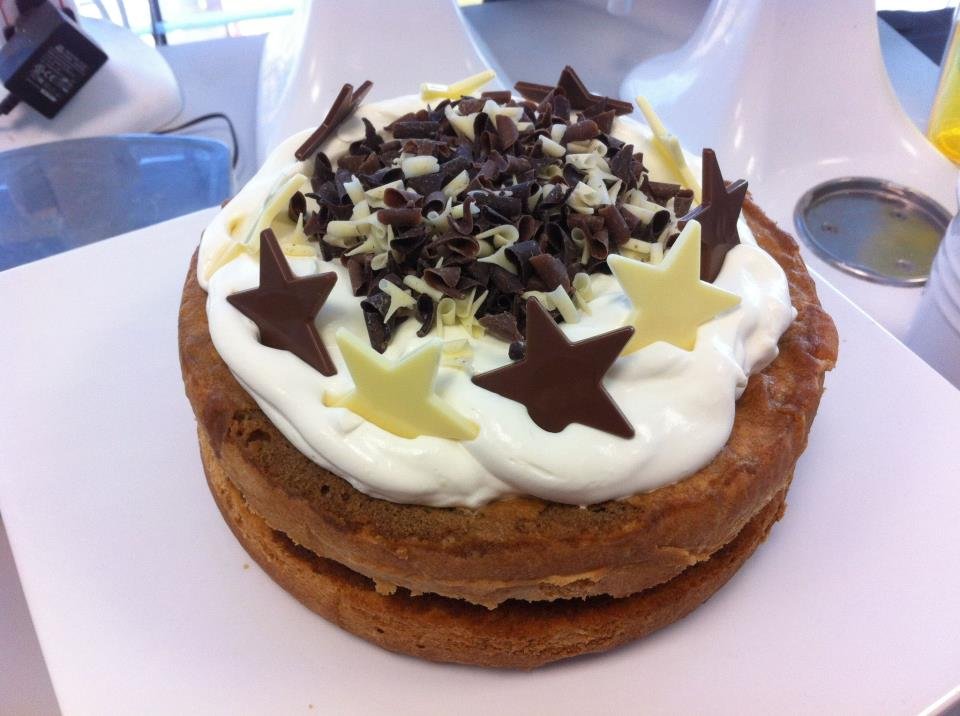
Way no. 3 – Amaretto coffee after dinner cake
75mls Amaretto mixed into 75mls strong black coffee cooled
500mls double cream
Chocolate stars and sprinkles to decorate
Brush the sponge layers with the coffee amaretto mixture and then whisk the double cream on a medium speed with the wire whisk until just holding peaks. Sandwich the sponge together with cream then top with more cream and chocolate sprinkles.
Way no. 4 – Banoffee cake
500mls double cream
397g tin of caramel (or make your own)
2 bananas cut into slices and bathed in lemon juice
Chocolate shavings made by running a knife along a block of dark chocolate
Whisk the double cream on a medium speed with the wire whisk until just holding peaks. Sandwich the sponge together with the caramel, then a layer of banana slices and then a layer of cream. Repeat on the top. Add chocolate shavings and serve immediately.
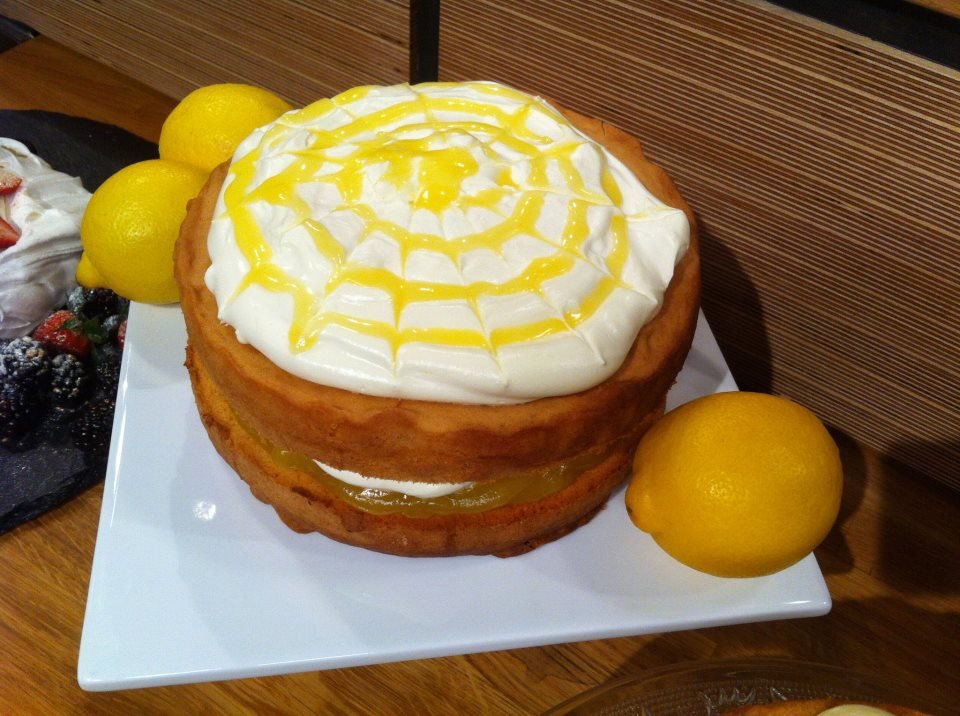
Way no. 5 – Lemon drizzle curd cake
100mls lemon juice
100g castor sugar
The zest of one lemon
1 jar of lemon curd
500mls double cream
Add lemon zest to the cake mixture if you wish. Heat the lemon juice and the sugar in a small saucepan until all the sugar has dissolved and the sugar syrup is bubbling – takes about 2 minutes. Allow to cool and then brush over one layer of the sponge. Then use lemon curd to sandwich together, add whipped double cream if you like and then add the second layer of cake. Add more lemon sugar syrup and top with double cream and a teaspoon of lemon curd watered down to a pouring consistency (like single cream) and drizzled in circles over the cream. Use a toothpick to pull the circles out like a spiders web if you wish.
This is an unashamedly girly cake. Pink buttercream, soft and moussey, used to sandwich an innocent vanilla sponge and crowned with tart raspberries. Perfect for a birthday, an afternoon tea or a summer party. Just add pink fizz and the Barbie horror is complete!
All comments gratefully received. Here are some Eastery recipes you might like too:
For Kitchen Aid: Mix all the ingredients together using the flat beater until light and creamy – takes about 4 minutes. Pour into two greased and lined round tins and bake in a preheated oven at 180C/Gas 4 for 20 – 25 minutes until well risen and golden brown. A toothpick should come out of the centre clean. Cool on a wire rack and remove from the tins once you’re able to stand the heat. (Non KA users use the all in one method and combine with your mixer/wooden spoon until light and creamy.)
Ingredients – buttercream
200g soft salted butter
400g icing sugar
2 tbsp rose extract/water
Pink food colouring
Instructions for Kitchen Aid: Use the flat beater to cream the butter until soft and light – about 4 minutes. Then add the icing sugar spoon by spoon, mixing on a low speed until all incorporated, add the rose extract. Then beat on high for 7 minutes until the buttercream looks like mousse – flecked with air bubbles. Add food colouring if you wish then use to sandwich the cakes together. Place more buttercream on the top and use 300g raspberries to decorate. NB – I decided against raspberries as I rather liked the rose swirls. These are easy to pipe with a Wilton 1M nozzle by doing a reverse Mr Whippy. Start in the middle and work out, taking the pressure off as you come to the end. (Non KA users be prepared for using a lot of elbow grease! Use a wooden spoon or other mixer and beat until you have a mousse like buttercream.)
I am fed up of waiting for my friends. I’ve said it now. This isn’t a rant about lateness, oh no. This is a missive to my friends to hurry up and reach the same life stage as me. Because I miss them. Let me explain.
I was the first of my peer group (by peer, I mean people roughly the same age as me who I have had major life experiences with… uni, work etc) to have a baby. I wasn’t that young, 28 in fact. But no-one else was having them. Then a few did and I was mighty pleased. It made me feel normal. But there are a fair few who haven’t had children yet and I so want them to. I know this is controversial I know it’s none of my business. I know that lots of people choose not to have kids and are very happy that way and… well, that’s fine, I know children aren’t a shortcut to happiness. However, if my friends could all just have a baby asap that would make me very happy. In the same way that at uni everyone HAD to drink too much, skip lectures and have an inappropriate boyfriend; ow in my 30s, I just want us all to be the same again. To all be perpetually tired and spend our days running up hills shouting ‘I’m the king of the castle!’
Not everyone wants the same things. Take this plum and almond crumble cake. My husband likes it a lot. My eldest son gave the verdict ‘you are a very good baker mummy’ and my visiting friends finished their slices and looked happy enough. Me? I can’t bear this kind of cake. Cold cooked fruit encased in cake and crumble? Sorry, not for me. Warm, yes, but cold, blergh. But so many of you have expressed an interest in it that I have faithfully copied the recipe down. Here it is. If I were you I’d reduce the fruit by at least a third.
Preheat the oven to 180C/Gas 4. Grease a line a cake tin with a loose bottom – mine was about 28cm across. Make the sponge by beating all the ingredients together until light and fluffy. This batter is a little thicker than a normal cake batter – needs to be to carry the moisture in the plums. Spread across the bottom of the cake tin evenly. There isn’t much of it. Worry not.
Slice the plums into 6 slices each, removing the stone as you go and lay in concentric circles over the cake batter. I had enough for almost 2 layers. Here is where I would reduce the fruit if I made it again and have one layer. So maybe 550g fruit. Then make the crumble topping by rubbing all the ingredients together until you have a rubble like consistency and then pop it on top of the plums. You will see some fruit through the rubble. Bake for 50 minutes and either serve warm with custard (yum) or cold (yuck.)
NB: This is best eaten on the day it is made. Gradually, just gradually, the moisture from the fruit seeps down into the cake. Soggy bottoms aplenty.
What does love feel like? When I was 15 and fell in love for the first time with a thud and a clang it made me feel sky high. A heady combination akin to gas and air, red wine and altitude sickness. Food repelled me, so satiating was this new sensation. Concentration was not mine. I had face ache from smiling too much. I was of course the first person to discover this feeling and NOBODY understood.
And of course when he ditched me for an older girl who was altogether more exciting, with raven hair, a flat of her own and a beaten up denim jacket with untold stains that told hair raising stories, well I thought the very core of me was dropping through to my feet, never to be returned again. It hurt. So much. Physically. Ouch.
Thank goodness that pain was never to be repeated. The only good thing to have come from this experience? I am truly empathetic to heartbreak. Come those teenage years I will never, ever, ever tell my sons to ‘get a grip’ in the face of gut wrenching love sickness.
I offer you Love cupcakes. The crunch of the simple, pure chocolate, the softness of the sponge and the surprise caramel centre make these perfect for surprising the one you love. Just make sure they’re worthy of your affections. And beware of raven haired temptresses beginning with the letter S.
Chocolate topped vanilla cupcakes with secret caramel centres
Makes 12
Ingredients:
140g self raising flour
35g ground almonds
175g castor sugar
175g baking margarine/butter
3 large eggs
1 tbsp vanilla extract
Approx 60g caramel
100g milk chocolate
100g dark chocolate
Decorations
Preheat the oven to 170C/Gas 3 and check there’s a rack in the middle of the oven. Then beat the flour, almonds, sugar, marg/butter, eggs and vanilla together until light and creamy. Takes about 4 minutes in a stand mixer. More by hand with a wooden spoon. Divide between 12 cupcakes cases lining your tin and then bake in the centre of the oven until just starting to brown and when a toothpick comes out of the middle cupcake clean. Remove from the tin and cool on a wire rack.
When cool take an apple corer and remove the centres of the cakes, being careful not to go all the way down to the bottom. If you accidentally do remove the whole plug of cake then cut a bit off and poke it back into the cake hole. No one will know.
Carefully pour a teaspoon of tinned caramel (or make your own if you fancy it – loads of recipes to be found on the internet) into each hole and then use a toothpick or skewer to poke the caramel down.
It’s so gloopy it may well get stuck on the top so help it along with a poke and a jiggle. And as for leftover caramel… use it to fill a victoria sponge. To make ice-cream sundaes. To make banoffee mini pavs. Or just eat. Or slather it on your hair as a conditioner. I don’t actually know if this last idea works but it might do.
Then melt your chocolate in the microwave or over boiling water, you know what kind of melter you are. Carefully spoon a teaspoon onto each cake, then a little more if the Love Cake can take it. Pop whatever decoration you have on the top and leave to set. Eat with love, with people you love.
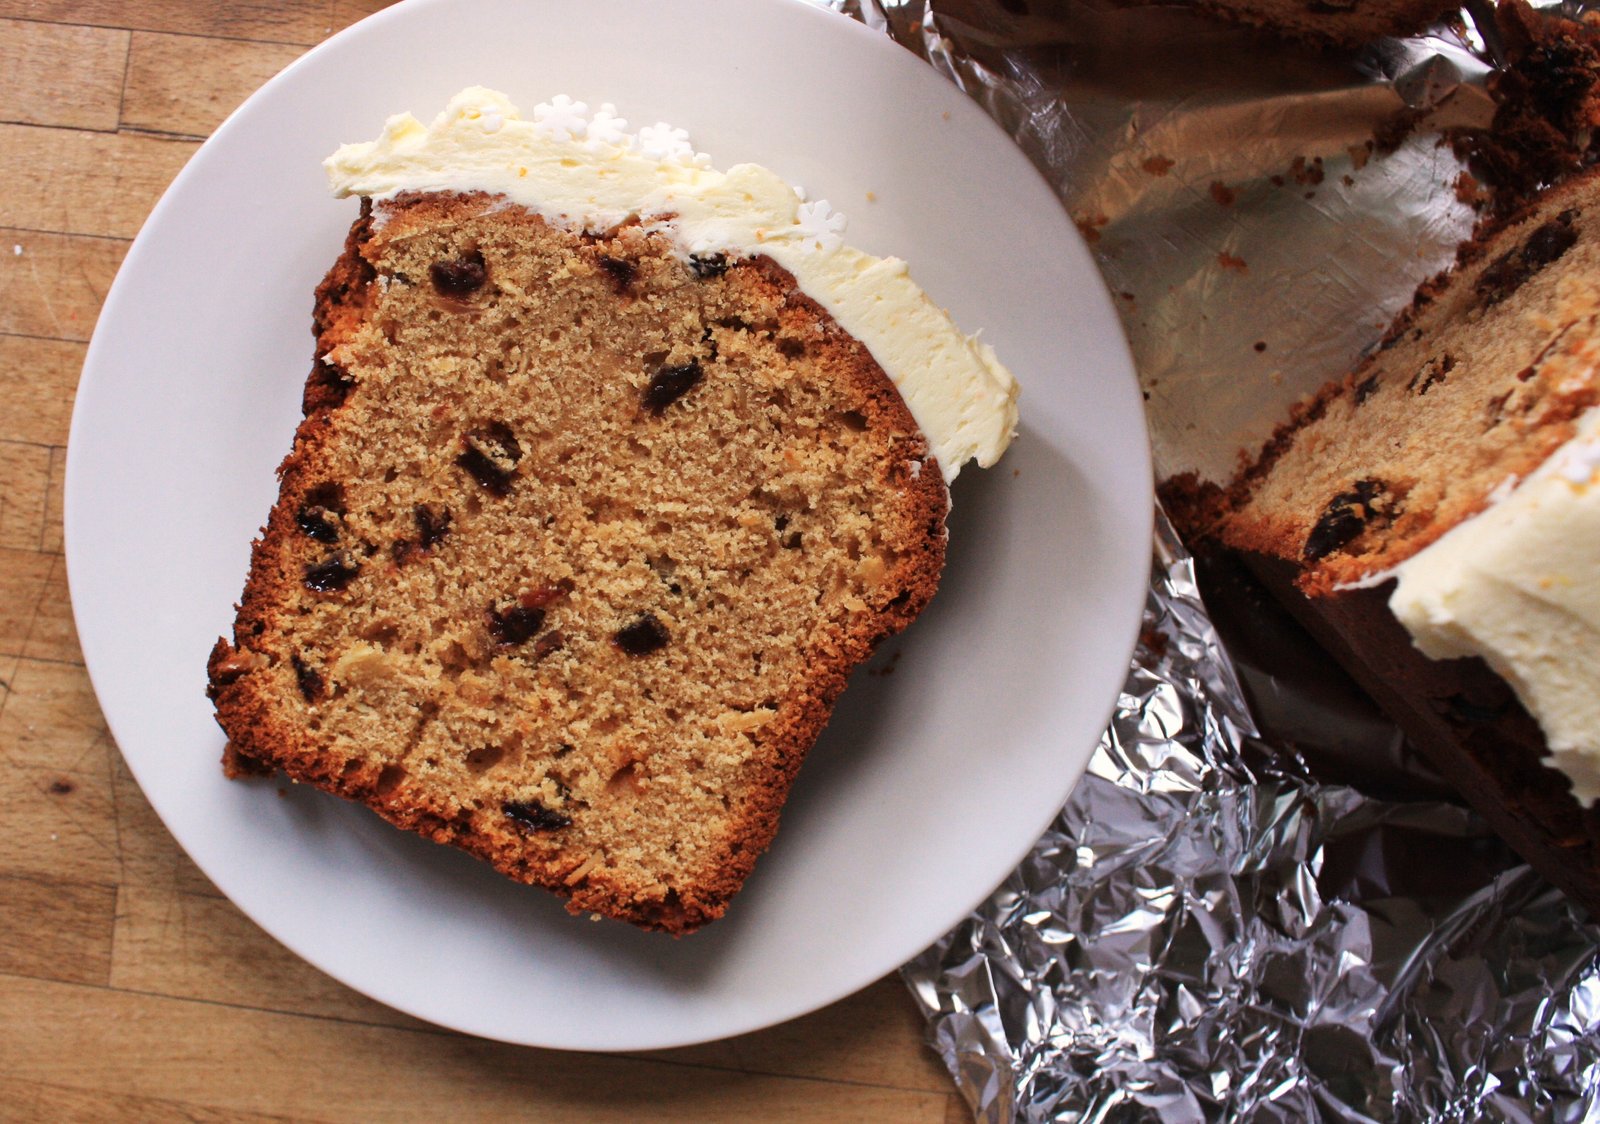
A Christmassy cake that doesn’t make your teeth itch from fondant icing, or break them with fondant’s posh Royal sister. An honest fruit loaf, flecked with toasted almonds, a hint of gingerbread and topped with the lightest fluffiest brandy butter inspired icing you ever sunk your teeth into. It doesn’t keep for long, but then it won’t have to.
Ingredients:
– 200g soft butter
– 200g soft dark brown sugar
– 400g self raising flour
– 100g sultanas
– 100g toasted flaked almonds
– 4 large eggs
– 4 tbsp milk
– 2 tbsp gingerbread syrup (if you don’t have it, substitute with more milk and 1 tsp ground ginger and cinnamon)
– 100g soft butter
– 245g icing sugar
– Zest of 1 orange
– 15mls brandy
This recipe makes a monster of a fruit loaf, big enough to fill a tin that measures 25 x 11 x 7cm. If you prefer your cakes on the dainty size then please feel free to halve the quantities. Look how big it is!
Preheat the oven to 180C/Gas 4 and grease and line your loaf tin. Cream 200g butter with the soft brown sugar until creamy looking. Takes about 4 minutes using an electric mixer or about 10 minutes by hand with a wooden spoon. Then add the flour and mix again until you have a dry breadcrumby consistency. Next add the fruit and nuts (which you can substitute for whatever you like but please do toast whatever nuts you add as it makes all the difference to the end result.)
To your very dry looking crumble type mixture add all 4 eggs, the milk and the gingerbread syrup if you have it. Mix well until all combined then smooth into the loaf tin and bake in the centre of the oven for about an hour and 15 minutes until a skewer comes out of the centre of the loaf clean. Do check it from 50 minutes onwards though as all ovens are very different. If it looks like it’s browning too quickly on the top but is still raw inside then feel free to fashion a foil hat for the top of the cake to protect it.
Leave to cool on a wire rack. Make the brandy butter icing by creaming 100g soft butter with the zest of an orange and the icing sugar. Once really fluffy (7 mins top speed in a stand mixer or at least 12 minutes with a wooden spoon) add the brandy and mix again.
Spread onto your cooled cake and add any decorations you fancy. Keeps for 5 days in an airtight tin or freezes very well without the icing too.
I’m a bit of a late adopter with some things. I was almost a teenager when I learnt to ride a bike. I only recently got my first iPhone and even then it was a donated one. And I had never eaten, let alone made a cake pop until recently. Unlike the bike riding, I think the cake pop addiction is a habit here to stay. I am ever faithful to all things novelty.
Here are a few good tips I’ve found through trial and error to make perfect (well almost perfect) pops. This makes about 13 pops.
Take your leftover cake. If you are going to eat the cake pops within a couple of days then you can use your own homemade cake. If you want a little longer shelf life then buy one of the value blocks of Madeira cake from a supermarket. Usually has a good few weeks on it. I know, I know, homemade is best, but if I don’t say it someone will ask. As for flavours and types of cakes, I tend to use leftover vanilla cupcakes using a basic sponge recipe, however you can use any flavour you like. I haven’t tried fruit cake yet but I assume it would work okay. Just be careful of the weight of the pop. More on that later.
Use your fingers to break the cake up into breadcrumbs. You need a light touch rather than a squeezing touch. You can also use a food processor or the flatbeater in your stand mixer. I tend to use my hands as I don’t make cake pops in huge quantities. Leave your cake crumbs in a large bowl and then add your buttercream. (If you do make too much cake pop mixture then freeze at the ball stage and you’ll have more pops for a rainy day. A great tip from Jo.)
I use the old fashioned half butter (salted if you’re interested) to icing sugar buttercream recipe with a good tablespoon of vanilla extract, beaten in my stand mixer for 7 minutes until light and fluffy. However, for cake pops you really don’t need light and fluffy buttercream. So if you’re making buttercream especially for cake pop purposes then I would probably use a wooden spoon. You can use any flavour buttercream by the way… much like with the sponge.
Add the buttercream to the cake crumbs one tablespoon at a time and give the mixture a good stir. All cakes bind with buttercream differently. What you’re looking for is the cake to come together with the buttercream into a thick spread like consistency that will hold a shape. Too dry and the cake pop will crack whilst it’s chilling. Too wet and the buttercream will melt when you dip in the Candy Melts. Test it by taking a tablespoon of mixture and scrunching it up with your fingers. It should hold easily and then be happy to be rolled between your palms. Cover the mix with clingfilm and then refrigerate for about 30 minutes. If you haven’t make cake pops before add one teaspoon of buttercream at a time. You can add, but you cannot taketh away.
After 30 minutes you can start to roll your cake truffle mixture into balls about 2.5cm across between the palms of your hands. Any larger and you run the risk of the weight of them dragging them off the stick when dipping. Oh and don’t add oil to your hands or anything else to stop it sticking, just go with it. Once rolled, pop on a plate lined with greaseproof paper or back into the bowl you chilled the cake pop mixture in and either put in the freezer for 20 minutes or if you don’t have room in your freezer (my hand is firmly up) then cover and pop back in the fridge for an hour. You don’t have to shape your cake pops into balls of course, you can instead shape into cones to make Christmas trees or Santa hats. Whatever you fancy really. Here’s a little film to show how:
A few minutes before you’re ready to start to dip and decorate your pops, melt your Candy Melts. I use the microwave in 20 second blasts – the packets have all the instructions. If you do overheat them they seem to lose their shine when dry. Instead you could melt the Candy Melts over a pan of simmering water instead to control the temperature better. Make sure whatever you end up transferring your melts to that the receptacle is small enough in width to allow the Melts to have a little depth. You need to have something to dip into. (I know some of you will prefer to use chocolate to dip your pops into… I have found it less easy as it takes a little longer to dry. You just need a bit more practice I guess.)
Find something to rest your still wet pops in to allow them to dry. I use an upturned meatball griller (!) but you could also use a block of polystyrene with holes poked into it, an egg box with yet more holes poked into it or an upturned colander if the holes are big enough. Dip a lollipop stick about half a centimetre into the melted Candy Melts and then push the stick into the rolled cake pop until it’s just over half way in. Set aside and allow about a minute to dry. This stage is important as it stops the cake balls from falling off the sticks later.
I tend to get all the sticks into the cake balls first. It makes best use of the dry time required. It also makes sure your Candy Melts aren’t so hot that they make the cake expand and crack through the dried Candy Melts shell once you dip the whole cake ball. Using boiling hot Melts to dip cake into ends in cracked pops and possibly tears. (If it does happen just allow the pop to set and then dip again as if starting with a nude cake ball. Just a thicker coating but better than trying to patch the cracked pop up.) Here’s a little film of the whole process from stick dipping to sprinkling: (If you prefer to read instructions then they’re all below the film along with some pop-pics.)
Then take the stick with the nude cake ball now attached to it and dip into the melted Candy Melts. Don’t start to swish it about as it’s likely to fall off. If your receptacle isn’t deep enough to cover all of the cake ball then use a teaspoon to bathe the cake ball in Candy Melts, gently pushing it over the cake ball. Then use the stick to pick the cake pop up and hold the stick against the side of the dish and tap very gently encouraging the excess Candy Melts to fall back into the dish. You can turn the pop as you do this to ensure you don’t end up with a peak drying where the Melts drip into the dish.
Using Candy Melts is very easy but it’s different from chocolate as it dries more quickly. Either allow to dry by carefully placing the stick into your drying rack of choice or take this opportunity to hold the pop over an empty dish and sprinkle anything you fancy over the still wet pop. You can use a toothpick or fork to make a spikey cake pop if you like by pulling at the Candy Melts covering as it dries. You could also allow the pop to dry with one coating and then use an icing bag to dribble another colour over the pop… the possibilities are endless. Oh and you can even melt your Candy Melts into a disposable icing bag in the microwave, just balance in a jug.
P.S. For those who might ask the Reindeer and Santa faces are from Sainsbury’s, as are the red, white and green sprinkles. The holly leaves and berries are by Wilton (though you can get similar from Sainsbos) as are the little white snowmen on top of the Christmas tree pops. The holly leaves were attached using a white icing pen, the type you buy that comes with nozzles to just attach to a toothpaste type tube. Lastly if you have Candy Melts leftover you can allow them to dry, seal in a bag and then re-melt again the next time you need them. They don’t get upset by repeated remelting like chocolate does. (Same goes for if you’re a slow-dipper and they get too solid half way through the process, just re-heat.)
I’m a mum of 3 boys, a cookbook writer and also a finalist on the 2011 Great British Bake Off.
I’ve decided to record the recipes I use, partly to save them somewhere and partly in case someone else might like to use them...
[Read more]
Just sign up to receive my latest blog posts straight to your inbox: Simply click here.
P.S. To sign up for my free monthly newsletter just click here. It has a baking SOS, recommendations on bits of kit I can’t live without, my kitchen catastrophe of the month, a sneak preview of a recipe coming up on this blog and a letter from me telling you what I’ve been up to.
Remember to check your inbox for a confirmation email and also to add my email recipesfromanormalmum@gmail.com to your contacts. Otherwise I could go to spam.


 Holly Bell