They are all promised to help entice overdue babies out. And in my opinion none of them work. As anyone who’s ever gotten anywhere near their due date (and/or gone past it) will tell you, helpful people start to offer advice as to how to get the baby to make his/her appearance as you near 40 weeks. Go past 40 weeks and people fall over themselves to ask you highly personal information about how much sex you’re getting and gulp… if you’ve tried nipple stimulation. The lack of privacy starts before the labour ward.
My lovely, dear friend Alison is about to give birth to her second baby. She’s due this weekend. This one’s for you Alison. Though you need to add more chilli as I’ve heard that it might help induce labour… especially if you eat it whilst having sex and bouncing on a ball and with a pineapple chaser…
Ingredients:
500g paneer
350g frozen peas
2 medium onions
1 x 400g tin chopped tomatoes
1 inch worth of fresh ginger, peeled and chopped
4 cloves of garlic, peeled and crushed
1 tsp turmeric
1 tsp garam masala
1 tsp ground cumin
1 tsp ground coriander
1 green finger chilli
a splash of veg oil
1 tsp salt
Heat a splash of oil in a large frying pan and fry the paneer until starting to sizzle and brown. Once it’s done scoop it out and set aside on some kitchen roll. Turn the heat down and add the peeled and chopped onion with the salt. Fry on a low heat until soft and almost translucent. Then add the spices including the chilli (finely chopped including the seeds) and the ginger and chilli. After another 5 mins add the tinned tomatoes. Fill the tin back up with water and add this to the pan. Turn the heat up and give it a really good stir. When it starts to thicken a little add the paneer back in and also the frozen peas. Leave to simmer away for around 15 minutes until you have a yellowy cheesy pea stew. (I think it might need to be renamed cheesey peas given that our local curry house would likely laugh at my interpretation of mutter paneer.)
Get the monthly newsletter...
and subscribe to get all recipes straight to your inbox!
Is it normal to consider moving house for a baking related reason?
I made hot cross buns the other night. They were not as good as the shop bought ones. Big fail. But it’s not my fault you see. It’s the house. It’s too cold for proper proving. Cue strop about how rubbish the house is and that WE MUST MOVE. If only to bake perfect hot cross buns once a year. Perfectly sensible.
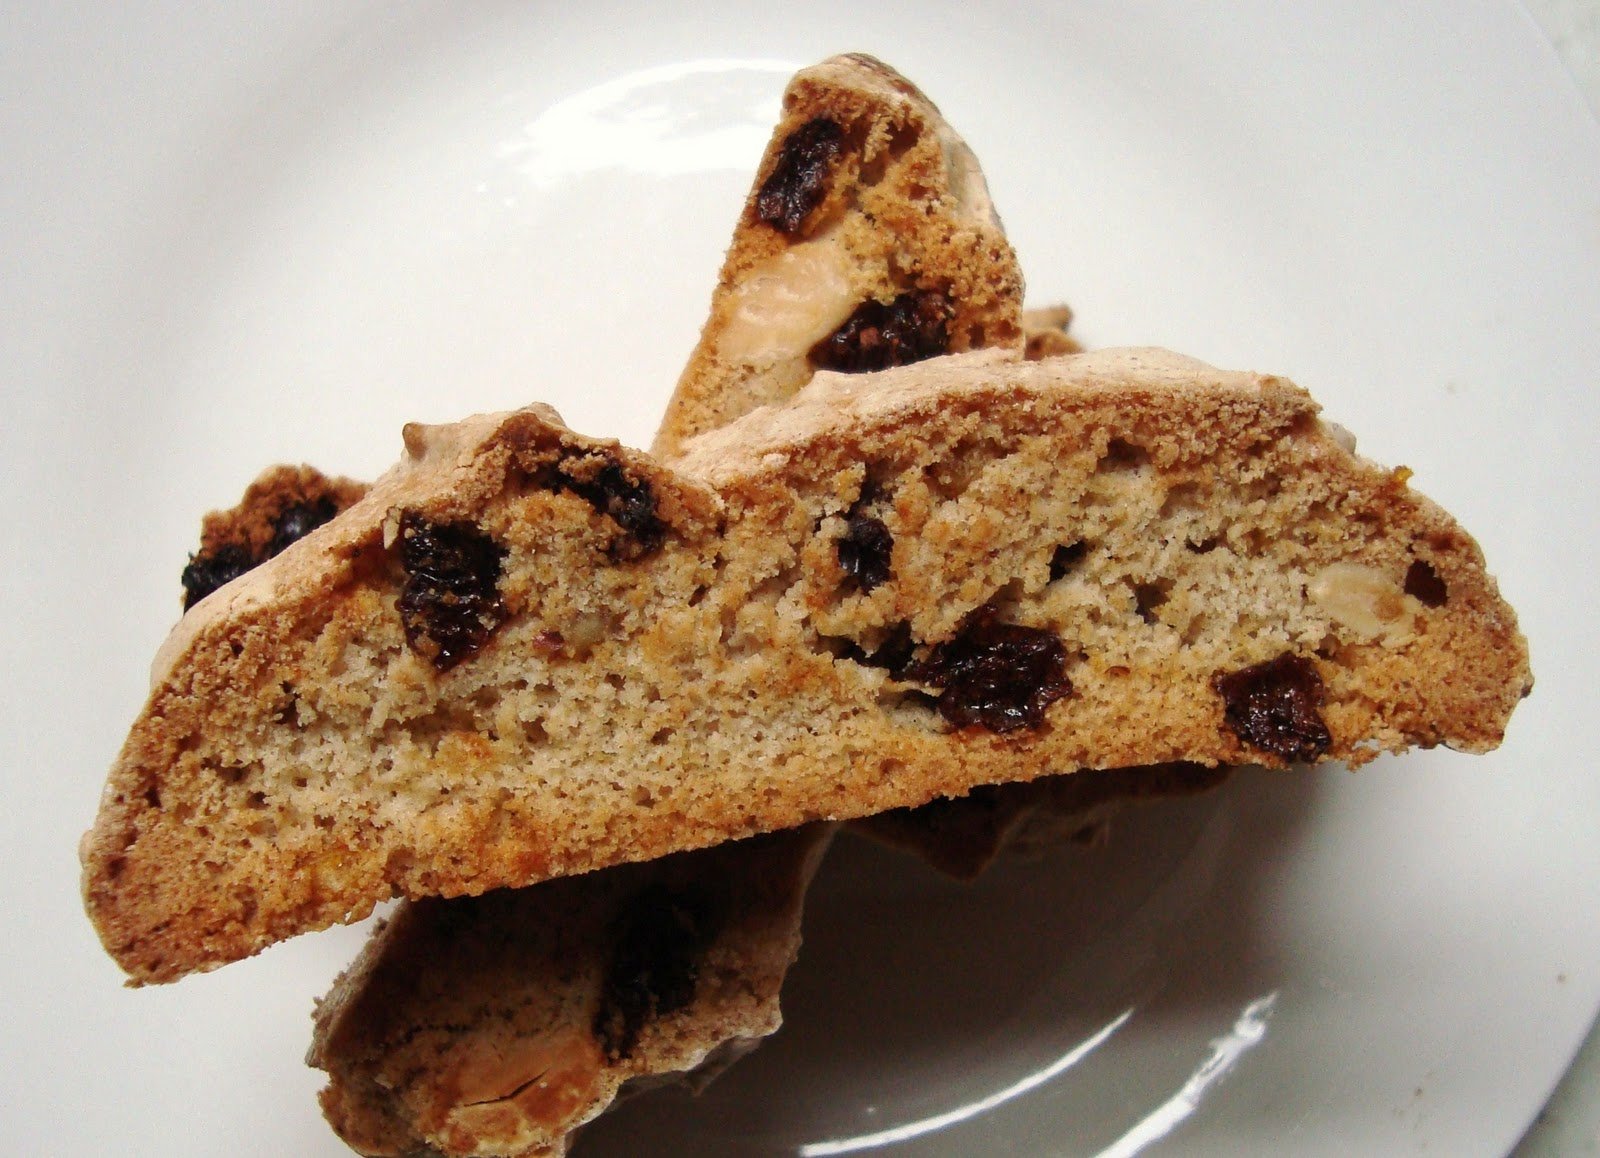
Anyway, as the housing market is slow and Mr B is a lot more level headed than his dear wife, I had to come up with an alternative way to get my hot cross bun kick. I am pleased to announce that hot cross biscotti are:
Easy to make.
Quicker to make than buns.
Require no proving.
Are delicious dunked in Earl Grey tea.
Make the house smell suitably Eastery.
Have an amusing name that make them sound hot under the collar and angry.
Keep for 2 weeks (!)
Make you feel a bit sophisticated and Italian when you eat them.
Can be given ready made or in a cute ‘just add an egg’ glass jar as an alternative to the usual chocolate Easter egg type gift. (Yeah, right – think that might go down badly with a lot of people…)
Anyway, I like them (which is saying a lot for a candied peel hater) and so does Mr. B. Charlie likes them too. If I weren’t so hell bent on feeding my second born son entirely healthy food I think he’d enjoy gnawing on them to ease his teething pain.
Ingredients:
50g blanched and toasted whole almonds
1 large egg
100g caster sugar
1 tsp orange blossom water (Frankly, you can omit this but I bought some on holiday last year and am damned if I’m going to let it sit unused in the cupboard.)
130g plain flour
1/2 tsp baking powder
a pinch of salt
1/4 tsp ground cinnamon
1/4 tsp freshly grated nutmeg
4 cloves ground up
1/4 tsp ground ginger
50g raisins
15g mixed peel
Preheat the oven to Gas 4. If your almonds aren’t already toasted then pop them in a non stick pan and give them a quick blast on the hob. No oil. Watch them like a hawk. In fact, don’t leave the pan. They go from pale innocent looking things to burnt pellets in seconds. Once browned tip the nuts onto a piece of kitchen roll to cool.
Using an electric hand held mixer cream together the egg, sugar and orange water. Keep going until it’s thicker than when you started and a little paler. Add everything else and stir with a wooden spoon until the mixture is combined.
Turn the mixture onto a tray lined with baking paper (the white stuff not the brown stuff) and shape into a log. It’s quite sticky so you may need to put a little sunflower oil on your hands to do this. Then put your biscotti log in the oven for around 20 – 25 minutes until it’s brown in colour and your kitchen smells of Easter time supermarket bakeries.
Take it out of the oven and leave on the side for about 5 mins. Then move it gingerly onto a board (it’s still hot) and using a knife with a zig zag edge, cut into thin biscotti size slices. I’d say about 1cm. Put these slices back onto the baking paper lined tray, this time lying flat on their backs and then back into the oven for about 10 – 15 minutes until they’re golden coloured. Be careful of the smaller biscotti made from the ends of the logs. They have a tendency to burn so grab them from the oven a little earlier. This recipe involves a lot of attentive cooking come to think of it. Maybe not for an absent minded day otherwise you could have burnt almonds AND biscotti on your hands. Not good.
Get the monthly newsletter...
and subscribe to get all recipes straight to your inbox!
They like anything miniature (probably due to their own half pint size.)
They like anything that pretends to be something else.
I’m talking about Matey bubble bath that looks like a sailor, rucksacks that look like dead cows slung across their backs, beds that double up as trains and chocolate mice. I have to say I’m with them on this particular like.
So here’s a recipe remembered from my childhood, except I’ve made it even more mini than it was in the 80s. I hope you like it. Charlie and his little friend only got a couple each as I snaffled the rest. They are kind of canapé size after all…
Ingredients (to make 12):
30g butter (I used that light butter spread but only ’cause damned Tesco substituted 5 tubs of this for the 5 blocks of butter I ordered… who on earth did my shopping? Anyway, I now need to use it.)
10g golden syrup – this is about a heaped teaspoon.
100g milk chocolate broken into squares
40g mini shredded wheat cereal crumbled up between your fingers
half a bag of mini mini eggs, I used these from Asda but I have to say I used them for their look and not their very sugary, tooth enamel damaging taste
12 of those little tiny petit four cases
So quick and easy it’s tempting to eat the lot before it gets to the cases and make another batch. Obviously I didn’t do that though. That would be akin to eating spaghetti hoops from the saucepan.
Melt the butter, golden syrup and chocolate in a saucepan over a low heat until the lot has dissolved into a chocolatey shiny mess. Then add the shredded wheat and stir with a metal spoon until all the strands of ‘nest’ are covered. Using a teaspoon fill the petit four cases with the nest material, making a small dip in the middle of each nest for 3 little eggs to be pushed into. Leave to cool and in the unlikely event that these last beyond about an hour, store in a tin and not in the fridge. They go soggy in the fridge you see.
Get the monthly newsletter...
and subscribe to get all recipes straight to your inbox!
Charlie has many women in his life. One of them turned two recently. When asked what birthday she was celebrating she told everyone ‘six.’ Clearly this habit of adding 4 years to her age won’t last forever but I like that she knows her spiritual age.
Charlie’s spiritual age is currently eight. He loves the number eight – it’s taken over top spot from number two. He used to have two stories before bedtime every night. Now when you ask him how many stories he’d like he always replies ‘eight’. He finishes any counting game with the number eight too. He also requests eight treats after dinner each evening. Life is unfortunately full of disappointment for Charlie.
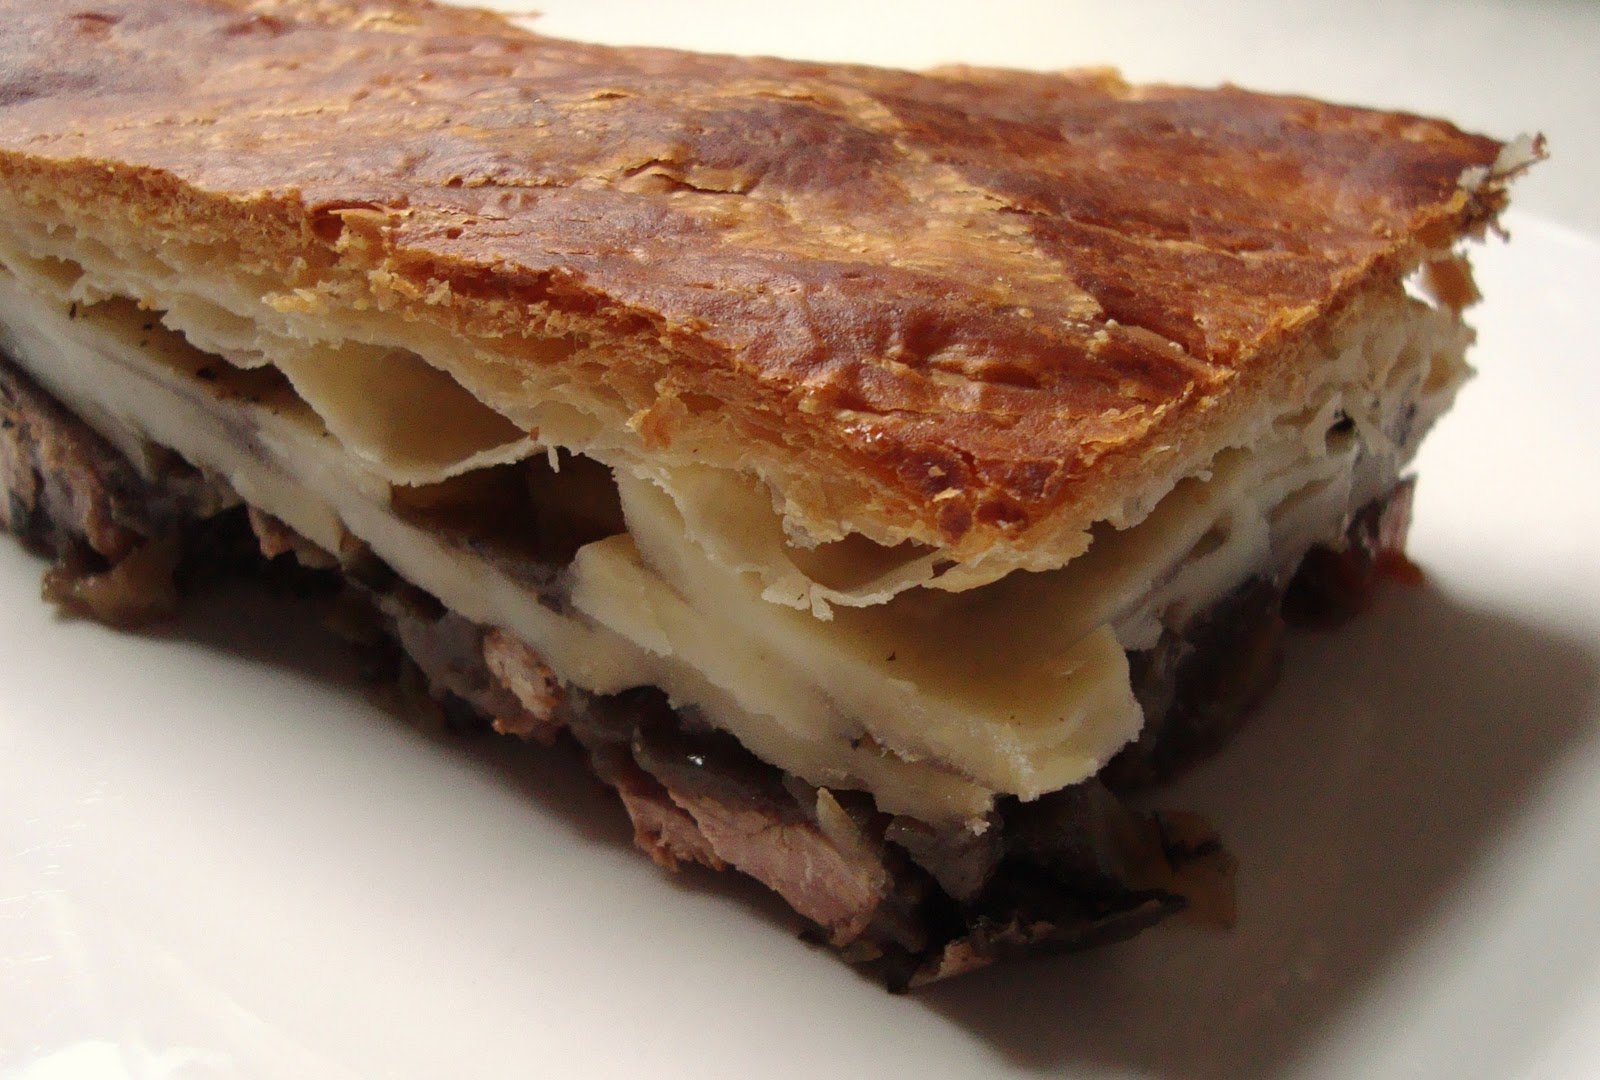
This pie was inspired by Charlie’s love of the aforementioned number. It has eight key ingredients. It is a man-pie (is there any other sort?) and serving it more than makes up for stealing your man’s beer to make it with.
Feeds 4 – 6. Also inspired by a pie on my lovely friend Hannah’s blog.
Ingredients:
2 tbsp sunflower oil
135g onion, peeled and sliced (1)
160g skirt beef cut into inch square chunks (Skirt is available at Morrisons though I haven’t found it anywhere else.) (2)
135g carrot, peeled and chopped into half inch chunks (3)
200g button mushrooms chopped in half (4)
1 tsp chopped thyme (5)
1 tsp ground black pepper
A pinch of salt
1 heaped tbsp plain flour
440ml can of Boddingtons (6)
2 medium sized potatoes peeled and sliced finely (7)
Pastry to cover the pie with – puff, short, filo etc – I used this (8)
Egg to brush the top of the pastry with
This is just so quick and easy to make. No stock, just crack open a can of Boddingtons. This does mean the pie is extra boozy in taste which is a bonus in my book. Worth getting hold of skirt – it is delicious and traditionally used for Cornish pasties, meaning once it’s encased and allowed to steam away it stews to the point of tender pretty quickly.
Preheat the oven to Gas 5 and make sure you have a pie dish that’s about 20cm in diameter. I use a ceramic one but metal will do too. Heat the sunflower oil in a frying pan then add the onions. Fry for 5 minutes until the smell fills the kitchen, then add the beef. The aim is to fry until the edges of the beef have browned so whack the heat up to achieve this if your beef is looking pasty.
Next add the carrots, mushrooms,thyme, salt and pepper. Give the mixture a good stir with a wooden spoon and turn the heat down slightly before adding the flour. Give it all another good stir to make sure everything is evenly covered in flour. Then add the Boddingtons. Keep stirring as the mixture thickens and then simmer for about 5 more minutes.
Once the ‘gravy’ has thickened transfer the lot into your pie dish and then lay the thinly sliced potatoes on the top, covering the pie filling until you can see it no longer. Then cover your pie with pastry. If using short or puff make sure you secure the edges to the pie dish by lining the rim with pastry offcuts using water, then securing the pastry lid to the offcuts with egg. Crimp the edges and leave a little overhang (cut off once cooked for perfect edges) then brush the lot with egg to get that wonderful creosotey glazed effect. Bake for 35 mins in the oven and serve with green things to offset all that beef and ale and pastry.
Get the monthly newsletter...
and subscribe to get all recipes straight to your inbox!
I don’t go out very often. I don’t mean this literally of course. I go out everyday except when Eldest Son has chicken pox, like he does at the moment. Then I stay in the house and read Thomas magazines. And watch Thomas DVDs. And search for Thomas episodes on youtube. And make Thomas cupcakes. I kid you not. The Thomas obsession only intensifies when fighting bugs.
What I mean is that I don’t often go out galavanting (as my Dad would call it) anymore. You see, I used to galavant a lot. Almost every night. Maybe I burnt out early, but the thought of my old social life makes me want to retire to bed with a cookbook and my slanket.
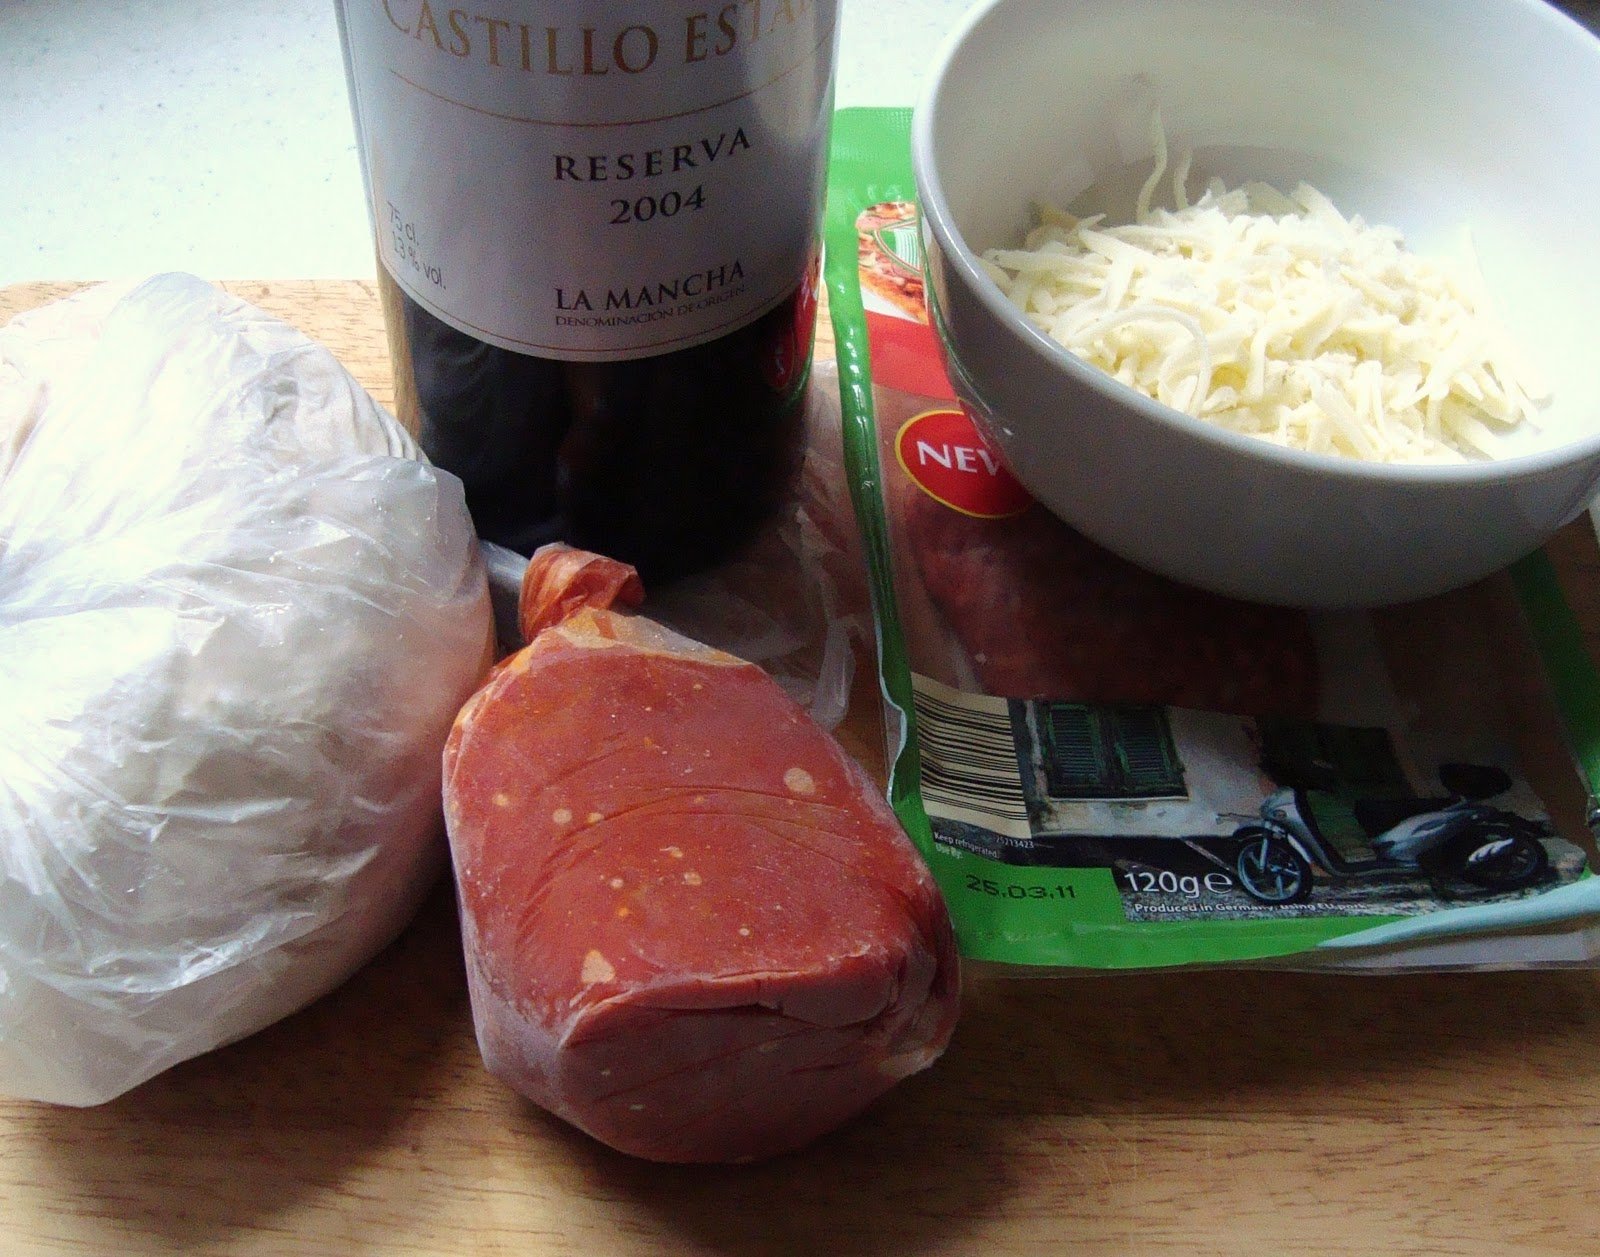
When I do go out I like to leave dinner ready for Mr B. It’s not that he’s not capable. Really it’s not. It’s more that I like to say thank you in a feeder fashion. In the form of a pizza kit – homemade dough, homemade tomato sauce, toppings cut up in a dish and of course a nice bottle of red to wash it down with. (Please excuse the frozen dough and sauce in the pic – photo taken early doors.)
You can use milk if you don’t have buttermilk. I think the buttermilk makes the dough seem lighter somehow and softer on the inside without compromising on the crisp crust. But that’s just me.
Ingredients:
650g strong white flour
7g sachet of easy-blend yeast
2 tsp normal fine salt (Or ground Maldon if you’re so inclined.)
30ml olive oil
50ml buttermilk (Next to cream at the supermarket.)
325ml warm water (A little cooler than a baby’s bath.)
A little semolina for rolling – not essential but makes for a crispier crust. Otherwise use flour.
To make the dough pop the flour, yeast and salt together into your food mixer bowl. Whizz together using the dough hook attachment set to medium speed. Then turn the speed to low and pour in the buttermilk and oil. Next add the water and leave on low speed until the dough looks elastic. Takes about 7 minutes. Remove from the mixer and cover with a damp and clean tea towel and leave in a warm place until it’s doubled in size. This takes about 2 hours in this house but in most normal warm places takes about 1.5 hours. Warning: this dough is stickier than most! Don’t worry if it doesn’t look as smooth and elastic as normal bread dough does. This is normal.
Once the dough has risen knock is back by turning it over with your hands three times whilst still in the bowl. Pop the bowl back into the mixer and knead using the dough hook on a low speed for about 2 minutes until your dough looks and smooth again. Remove the bowl and put the cloth back over the top and again leave in a warm place to prove for about 30 minutes to an hour. It should double in size again. Now it’s ready. Either divide into pieces, put into plastic bags and freeze or start making pizza.
If you’re making pizza with the dough rather than making guilt induced freezer dinner kits then first thing’s first, whack the oven to the highest setting and make sure the shelf is at the top. Remove the other shelves.
Take some semolina and put a handful on your work surface, then take your slightly sticky pizza dough and cover the whole thing in semolina – all sides. Then you can start rolling. (Use a wine bottle if you don’t own a rolling pin.) The aim is to get it as thin as possible without breaking. I never worry about the shape. Any shape pizza goes in the Bell house.
Put your dough onto a baking sheet making sure the edges don’t escape over the edge. Nobody wants burnt crusts. If you’ve made an especially large pizza then fold the dough into half and then quarters to transfer it to the baking sheet. Spread some tomato sauce over the top (I simmer a tin of chopped tomatoes, 2 tbsp of tomato puree, 2 tbsp olive oil, 1 tsp oregano, 1 tsp salt and 1 tbsp of sugar on the hob for about 30 mins but you can use ready made stuff) and then some cheese and whatever toppings take your fancy. Mr B likes some chilli chopped into the tomato sauce and then a general meat based topping. I like ham and pineapple but I was almost a child of the 70s so that might explain that.
Bake in the oven until the edges look brown and crisp and the topping is suitably cooked. Takes about 10 mins in my gas oven. Serve with napkins and a large pair of scissors for cutting. Much better than those little pizza wheel thingies.
Get the monthly newsletter...
and subscribe to get all recipes straight to your inbox!
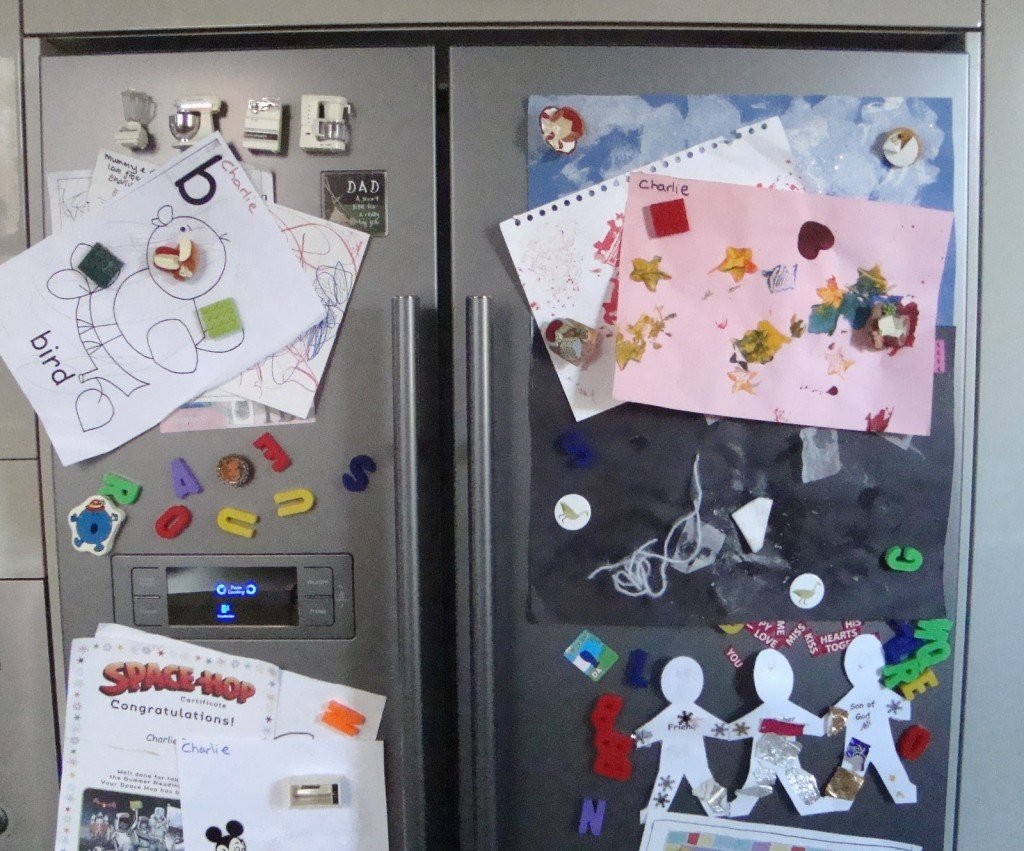
Nope, it’s not a mistake. I admit defeat. I cannot make sausage meat look attractive. Not in its pure sausagey meaty form. So here’s a picture of our fridge instead.
Before I met Mr. B I used to have fantasies about meeting a lovely man, getting married, having babies and then buying alphabet magnets for the fridge. Well, despite my lamenting to anyone who’d listen that I’d never meet ‘the one’ the fantasy did indeed come true and here’s the pictorial proof.
I never thought I’d be the type of woman who makes her own sausage meat. I also never thought I’d receive a sausage making attachment for my second wedding anniversary. Goodness, I love my husband. We have not looked back. It’s a whole different world of sausage worship. If you can, do it. You won’t regret it.
Here’s my recipe for a good basic sausage meat. It tastes great in sausage rolls – using homemade puff pastry or not. You could add anything to it really. Leeks would be nice perhaps.
Ingredients:
300g pork belly (Remove any big bits of fat or skin etc.)
300g pork shoulder (As above.)
200g streaky bacon (Remove any rind.)
1 tsp of ground mace
2 tsp ground black pepper
1 tsp salt
2 tbsp finely chopped fresh thyme
10 fresh sage leaves finely chopped
1 onion peeled and finely chopped
1 tbsp sugar
1 tbsp oil for frying (I used Crisp n’ Dry.)
Cut the pork belly and shoulder into 1 inch cubes and start to feed through your meat mincing attachment. This takes a while so start this off first. Do not be tempted to put the bacon through first – it tends to clog the attachment up. Bacon goes through last.
Fry half of the onion in the oil and the sugar on a low heat until it starts to turn a caramelly brown colour. Remove from the heat and let cool.
Once you have all the meat minced grab a large bowl and put everything into it. Then roll up your sleeves and start to squelch. That’s the best way to describe the sensation as you hand mix sausage meat. It’s quite satisfying and really the best way to get the lot well combined.
That’s it. Use as you wish. We have ours in sausage rolls. We have it for dinner fried in little stuffing like patties wrapped in bacon and sage leaves. Charlie has it fried in tiny balls for dinner with Smiley Faces. Max hasn’t had it yet but give him time. Freezes well too.
Get the monthly newsletter...
and subscribe to get all recipes straight to your inbox!
Everyone says it’s difficult. I remember it being hard to make at school. Even chefs say to buy it – that it’s not worth the effort. Well, after experimenting with a few different methods I can safely say it is not hard and it is worth the effort. Even if just to make you feel smug and a little bit wonderful.
Are you game? Come on…
This makes loads and loads of puff pastry but frankly, it takes a little time so there’s sod all point in making a small amount. Make loads and freeze in blocks. Defrost in the fridge overnight and use as normal. Puff pastry on tap! Loads by the way means enough to cover 4 family size pies.
Ingredients:
500g plain flour
3g salt (Normal stuff, not flakes of sea salt.)
500g unsalted butter at room temp. Unsalted is important here as you need to control how much salt goes into the pastry. Room temp is also important.
1 teaspoon of white wine vinegar
300ml very cold water (I keep a bottle filled with tap water in my fridge door for pastry purposes.)
WARNING 1 – you need some time in the house to make this. Not huge amounts of hands on time but a fair amount of time to faff about.
WARNING 2 – there are a hell of a lot of stages to the instructions. I am over explaining everything. It’s not as bad as it looks. Honest.
1) Weigh the flour and then remove a small handful. Pop it in a bowl. Sieve the rest of the flour into a large bowl (bowl 1), then sieve the salt in on top of it.
2) Take another bowl and sieve the contents of bowl 1 into it. Then do the same again so that the flour and salt ends up back in the original bowl and has been sieved 3 times in total. This is important. Don’t be lazy and not bother.
3) Weigh the butter and remove 50g of it. Rub this into the flour and salt mixture very finely so that you have a breadcrumb type mixture. Do this by hand. It gets better results.
4) Add the white wine vinegar to the flour mixture and half of the icy water, then take a normal knife and add start to cut the wet into the dry.
5) Keep adding a trickle of the remaining water at a time and cutting the mixture. DO NOT dump all the water in! You need to add just enough water to make the pastry come together. The amount will vary dependant on the weather, how humid your kitchen is etc. I have dumped the lot in before and the pastry was too sticky meaning less puffy puff pastry.
6) Once it is all coming together nicely and looks smooth put it into a freezer bag, squeeze all the air from it, tie in a loose not and put in the fridge to rest. It can stay in here overnight if you want to start yourself off the night before.
7) Take a piece of greaseproof paper and cut to just larger than the size of a closed magazine. Then cut another piece exactly the same size. Next, take the butter you have set aside and slice the lot into pieces about 1.5cm thick. Then start to arrange these on the greaseproof paper, side by side, as close as possible, leaving a 3cm lip free of butter all the way round. In effect, a block of butter should emerge just smaller than the magazine.
8) Now this is my own method and I’m sure any chef type person would choke at this – using your hands, press the butter pieces into each other. The aim is to get a magazine size block of butter without any spaces. One large flat piece. The warmth of your hands helps to push the butter together and solder it. Don’t worry about being heavy handed.
9) Put the other piece of greaseproof paper on the top and flip you butter sheet over to check the other side for gaps between the butter. If you see any butter use your thumbs and palms to push the it together – through the greaseproof paper this time though.
10) Take a rolling pin and lightly roll over the top of the greaseproof paper to get the butter block the same thickness at all points. Now put the block in the fridge for 20 minutes. Beware – 20 mins only. Any longer and your butter is too cold to roll easily and it’ll break through the pastry.
11) Using the flour you set aside earlier, dust the worktop you plan to roll on. Take the pastry from the fridge and with a well floured rolling pin, roll into the shape of a magazine. It MUST be that shape. You need sharp edges. It’s fine to use your hands to manipulate the pastry.
12) Take your butter block from the fridge (20 minutes only I hope otherwise you’re buggered…) and place on top of the pastry. There should be a 3cm lip of pastry on all sides. Now fold the butter and pastry in half and seal the three sides that have a lip of pastry by pushing them down firmly with your fingers. You should not be able to see any butter. Essentially you have a ‘butter present’ wrapped in pastry in front of you. Turn the pastry so that the end without the pastry lip is facing furthest away from you.
13) Take your rolling pin, making sure there’s enough flour to stop any sticking and press down on the pastry edge nearest to you, use enough pressure to get the pastry to a thickness of about 0.3cm and then with your hands wrapped around the rolling pin so that your knuckles are on the worktop, keep pressing and roll away from yourself slowly and firmly. You might need to stand almost over the pastry to use your weight to press the pastry block evenly.
14) Do not use a backwards and forwards rolling method. Reason – you’re more likely to end up with butter split through the pastry.
15) Once you have rolled the pastry to three times the length of the original size (if your work top is too short for this, like mine is, then fold the pastry nearest to you, that’s already rolled, into soft folds as you go) you’ve done the hard bit. From now on it’s plain sailing. Make sure the shape you’re left with has proper corners and straight lines. If it doesn’t then cheat and take a knife to it. You need it to have straight lines and edges. The puffiness of the pastry depends on it.
16) Take the long piece of pastry and lay it length ways in front of you so you have a long strip, then mentally cut it into thirds and then for real this time, fold the right hand side to where the first third ends and the left hand side all the way to the ‘new’ right hand side. Then you have a block of pastry that has three layers.
17) You now need to repeat stages 13, 14, 15 and 16 again. Then wrap your pastry in a new and clean freezer bag, gently squeeze the air from it and place in the fridge to rest for 30 mins.
18) Get the pastry out of the fridge and repeat stages 13, 14, 15 and 16 again twice. Pop back in the fridge and you’re done. Either use the lot in one go to make a million sausage rolls or cut into 4 pieces and freeze separately.
THINGS TO REMEMBER:
Bits of puff pastry you don’t use in your recipe from the final roll can’t be rolled up and re-used. Well, they can, but they won’t puff.
Egg wash (egg lightly whisked with a fork with a pinch of salt to break down the strands of white) brushed over the top of your pastry makes for a golden creosote finish. However, don’t be a sloppy washer – if you get egg wash down the sides of your puff then it won’t rise properly.
For best results bake anything with puff pastry at a high temperature (Gas 7 works for me) and at the top of the oven or the middle depending on what else you’re cooking.
Quit opening the door to check the puff. Leave it to do magical things without an audience. You might get frightened when you see it looking all diaphanous and beige before it reaches for the sky. I almost cried when I saw the state of it mid bake.
If you want to ring the changes you can use sour cream instead of water. The puff isn’t as puffy and the taste is denser. Eat straight away. Nice for savoury pies though.
Get the monthly newsletter...
and subscribe to get all recipes straight to your inbox!
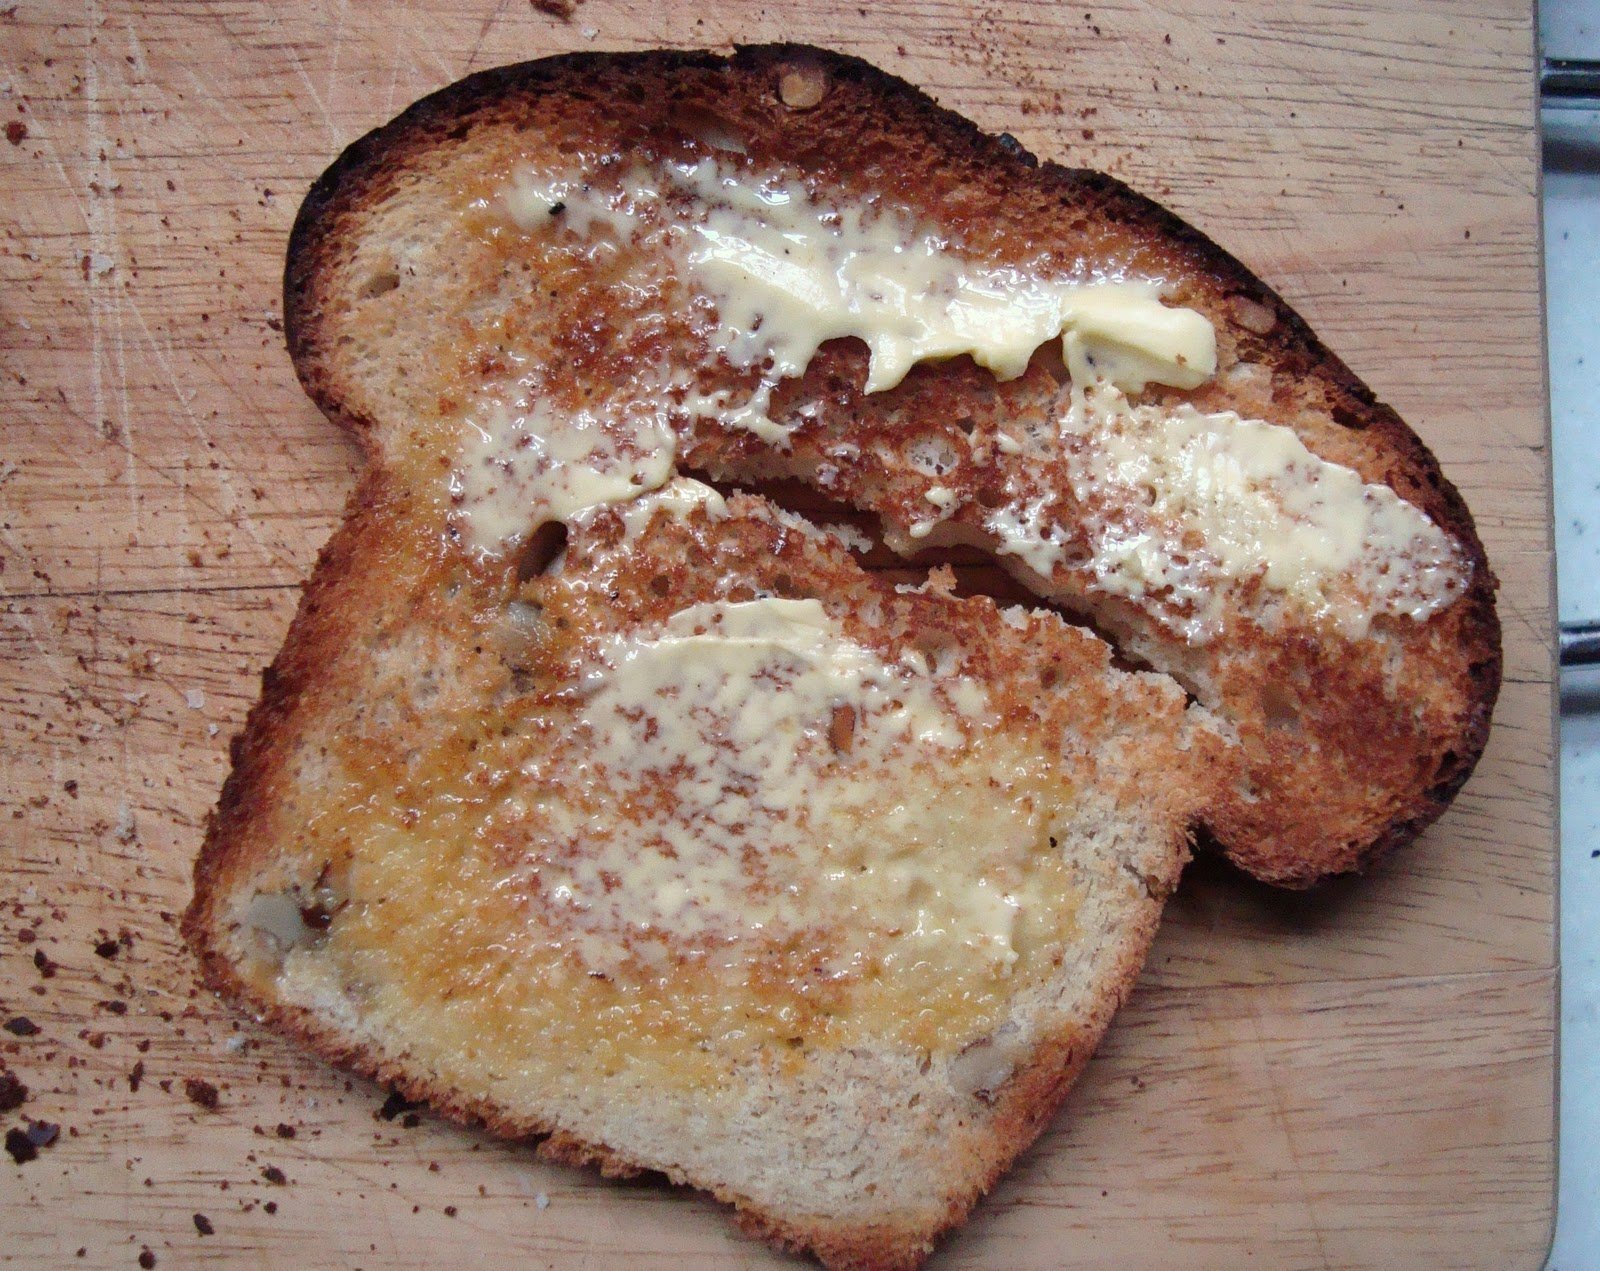
Sometimes people surprise you. Like when my Dad states Gavin and Stacey is one of his favourite programmes, or when my husband calls to say he’s in John Lewis looking for piping bags for me. Or when my two year old firmly shouts ‘bread yummy mummy.’
You see, Charlie has never been great with bread. I thought it was the admin time required to eat it in sandwich form. I thought it took both hands away from his train track for too long. I was wrong. He was protesting about the inferior bread being served. I stupidly assumed that small person = simple tastes. Not so. (Hey, I just couldn’t bear the thought of him being the kind of toddler who ordered his own babychino.)
Out with the old white sliced spongy bread and in with homemade walnut bread. Oh my, this bread is good, and I say that as someone who has been known to treat bread with caution (as a teenager of the Atkins revolution.) Now I say Eat Bread! This stuff is especially good cut into soldiers and dipped into egg according to Charlie. Or dipped into yoghurt – also according to Charlie. He’s coming over a bit Heston again recently.
5g salt (normal, normal, normal, no need for Maldon!)
50g soft brown sugar, the darker and stickier the better
25g fresh yeast (halve the amount if using sachet stuff but Morrisons do sell it next to the butter or ask at any supermarket in store bakery and they might just give it to you for free)
4 tbsp water – room temp
60g butter
250ml milk – blood temp – like you’d prepare a bath for a baby
60g walnut pieces
a little olive oil for greasing, or walnut oil if you’re feeling like a purist
Cook the butter in a saucepan until it browns – take off the heat and pour into a measuring jug that already has the milk and water in it. Pop your finger in – if it’s warm and comfy to keep it in there then add the yeast and whisk the mixture up. If it’s too warm leave to cool a little before you add the yeast. You don’t want to murder the yeast you see.
In your Kenwood or similar appliance add the flour, salt and sugar and mix on the lowest setting, using the dough hook for about one minute. Then add the yeasty mixture as it’s turning. Once it’s all in leave the machine running for around 4 mins until the dough goes from looking sticky to smooth and elastic like. Add the walnuts and let it run for one more minute to distribute them evenly.
Take the bowl out of the mixer, cover with a damp tea towel and then leave in a warmish, but not too hot place. A warm kitchen is ideal or I tend to put mine near a radiator as Bell Towers is on the cool side. Leave for around one hour until it’s doubled in size. Don’t put it anywhere too hot – not on top of a radiator for example. That’s too hot and will result in a fast rise. You don’t want that.
Then tip the lot onto a work surface and pull one side of the bread over into the middle, then turn 90 degrees and do the same, then two more times. That’s it. Very little knocking back for this bread. Roll into a loaf like shape and pop into a greased tin, then cover with clingfilm and leave for around 45 mins. When it’s doubled in size again simply put into the middle of a preheated oven Gas 8 for about 35 minutes. Watch it like a hawk – Gas 8 means the top might burn so you may need to turn it down a little if your oven is over zealous like mine.
This bread is so so good. I like it with cheese melted on it. I like it with eggs. I like it with sliced tomatoes and a little salt. I like it with pastrami and mustard. In fact I will pretty much eat it with anything. Make it! Your toddler and significant other(s) will love you.
Get the monthly newsletter...
and subscribe to get all recipes straight to your inbox!
Good husbands have a busy life. They work hard all day, they bathe the children in the evening, they selflessly taste huge volumes of sweet baked goods and then, just for good measure, they get up in the night to feed the baby. And as if that weren’t enough, in the morning they let their wife sleep in as late as possible and thus forgo their own breakfast. Lucky? Me? You bet.
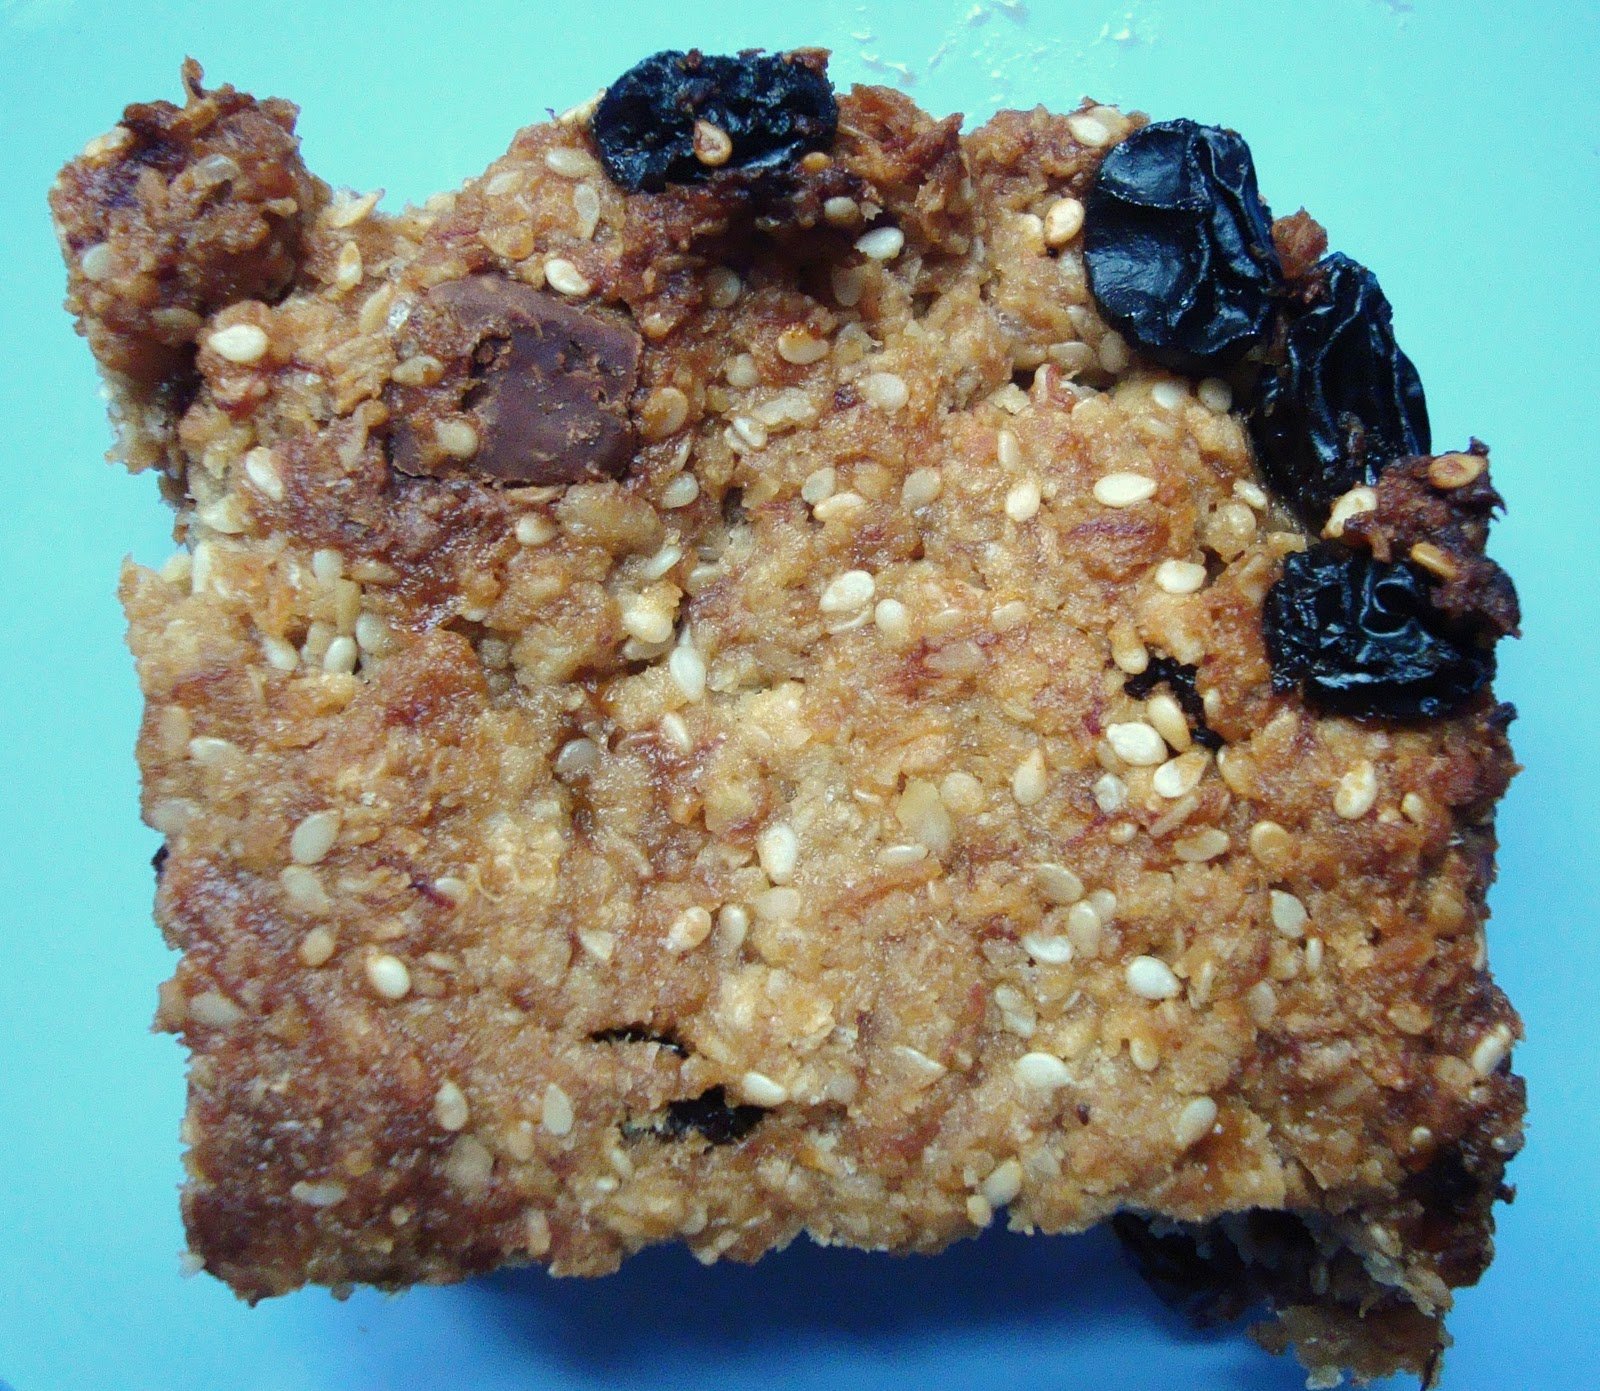
The least lucky old me can do is produce some form of portable breakfast snack for my good husband to take to work with him. I’m going to be honest with you… these bars aren’t the kind of treat you promise to your toddler as pudding. If you did that you might get something plastic thrown at you. What I mean is, they’re pretty good for you and they taste that way too. Mr B likes them though. And that’s what counts.
NB: These are not oaty breakfast bars, they’re not flapjacks, they’re kind of cakey in texture and crunchy on the top.
Ingredients:
100g butter
3 tbsp honey
100g brown sugar
200g Ready Brek
100g sesame seeds
50g desiccated coconut
100g raisins
2 tbsp apple juice
2 ripe, mashed bananas (large or if you only have small ones then add another for good measure)
100g milk chocolate broken into smallish pieces
Find a tray and line it. The one I used was about 30cm x 20cm but really, you can use any size. Just depends on how thick you like your bars. Don’t forget to preheat your oven to Gas 3.
Take the butter, honey and sugar and put into a large saucepan. Heat on a medium heat until everything has melted and looks syrupy. Take off the heat and add all the other ingredients except for the chocolate. Using a wooden spoon mix the ‘dough’ together. Lastly add the chocolate bits. (If you add them any earlier they melt into the mix and you don’t get that satisfying discovery of a whole piece of chocolate half way through a bite.) Pop in the oven on the middle shelf for about 45 mins until the edges are starting to brown. Usual routine of scoring whilst warm and then leave to cool on a wire rack. Cut into squares once completely cool.
You can adapt this recipe and substitute any dried fruits, nuts etc. Bit of a storecupboard sweep recipe.
Get the monthly newsletter...
and subscribe to get all recipes straight to your inbox!
I’m a mum of 3 boys, a cookbook writer and also a finalist on the 2011 Great British Bake Off.
I’ve decided to record the recipes I use, partly to save them somewhere and partly in case someone else might like to use them...
[Read more]
Just sign up to receive my latest blog posts straight to your inbox: Simply click here.
P.S. To sign up for my free monthly newsletter just click here. It has a baking SOS, recommendations on bits of kit I can’t live without, my kitchen catastrophe of the month, a sneak preview of a recipe coming up on this blog and a letter from me telling you what I’ve been up to.
Remember to check your inbox for a confirmation email and also to add my email recipesfromanormalmum@gmail.com to your contacts. Otherwise I could go to spam.


 Holly Bell