I have never been one to shirk away from novelty themes. You will find me absolutely cutting sandwiches into dinosaur shapes and creating faces on pizzas through the power of olive eyes and red pepper lips. I like to think it’s a quest to amuse my children, but actually it might just be that I’m a big kid.
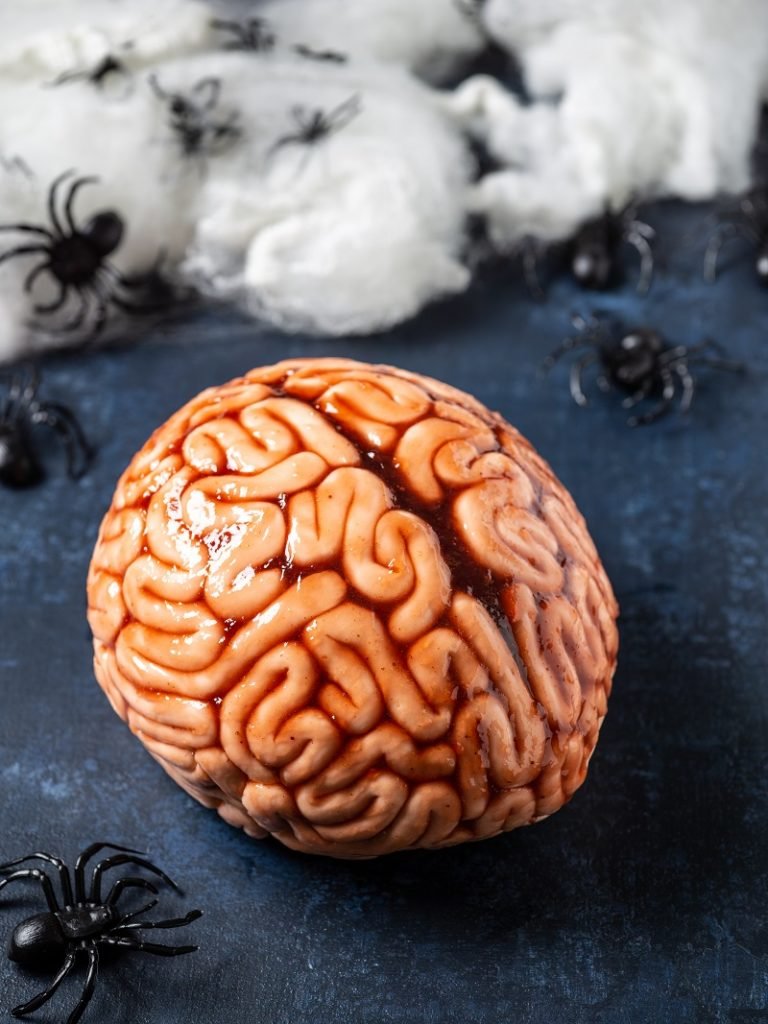
Autumn brings the opportunity for so much novelty fun. There’s back to school season, there’s Bonfire night, Halloween and of course the run up to Christmas. It’s a novelty cutter wielding fans dream. This year I have gone all out scary with a red velvet brain cake. If you don’t have the time or inclination to make the cakes for the base then simply buy a few madeira blocks from the supermarket.
This cake is a lot easier than it looks! Don’t forget to keep the cake offcuts and either eat as a chef’s perk or use to make cake pops.
This recipe first appeared in Back to School Magazine. Photography by Scott Choucino, styling by me!
Brain cake
Serves 12 at least
For the cake:
- 250g soft butter or Stork margarine, plus extra for greasing
- 600g castor sugar
- 6 large eggs, at room temperature
- 2 tbsp gel red food colouring (I used Sugarflair Red Extra)
- 25g cocoa powder
- 375g plain flour
- 250mls milk
- 2 tsp vanilla extract
- ½ tsp salt
- 1 tsp bicarbonate of soda
- 1 tsp white wine vinegar
For the decoration:
- 150g soft salted butter
- 1 tbsp vanilla extract
- 300g icing sugar
- 1kg white fondant icing
- Pink gel food colouring (I used Sugarflair ‘pink’)
- Flesh colour gel food colouring (I used Sugarflair ‘paprika’)
- Black gel icing food colouring (I used Sugarflair ‘liquorice’)
- 100g seedless strawberry or raspberry jam
Preheat the oven to 170C/fan 150C/gas mark 3 and grease and line 3 x 20cm cake tins.
Beat together all the cake ingredients apart from the bicarbonate of soda and the vinegar until well combined and smooth. Stir together the soda and vinegar until it fizzes and fold through the cake batter briefly. Divide equally between the tins and bake for 45 minutes until well risen and a toothpick comes out of the central cake clean. Remove and leave to cool on a wire rack.
Make the buttercream by beating the butter and extract until soft an adding 1 tbsp of icing sugar at a time, beating well after each addition. Lastly beat well for 5 minutes until light and fluffy.
Place one of the cooled cakes onto a piece of non stick baking parchment. Spread a thin layer of icing on it and add another cake, repeat and add the third cake. Use a serrated bread knife to crave a brain shape (it is easier to do this is you use a photo of a brain to work from – google search!). Cut a ravine into the central line of the brain to create an indent to indicate the two hemispheres. Coat the brain with a thin layer of buttercream and chill for half an hour before adding another thicker layer.
Knead the fondant icing on a clean work surface and add a tiny toothpick end full of flesh coloured food colouring, a little less of pink and just a hint of black. Knead well until combined. If you can’t get hold of these colours use regular pink and a little bit of black. Don’t use water based food colouring though as it’ll make the fondant sticky.
Roll a gold ball sized piece of fondant into a worm shape about 1cm thick and then wind into a worm and add to the cake. Ensure you leave a space between the two hemispheres as indicated by the ravine carved. Once each worm is added, use a toothpick to further indent each fold of the worm. Repeat until cake is covered, then turn the cake upside down onto a clean piece of baking paper and repeat on the underneath. Turn over, smooth with your hands and leave to dry.
Before serving lightly warm the jam and use a brush to coat the whole coat, pouring extra jam into the central ravine between the two hemispheres. Serve!
Get the monthly newsletter...
and subscribe to get all recipes straight to your inbox!


 Holly Bell