

This is another Halloween idea, rather than a cake recipe as such. You will need to bake a cake first or buy one – about 20cm across. Any flavour will do. Cakes such as this one or this one would be perfect.
This cake caused just as much excitement as the monster drip cake did in my house. The legs caused a particular stir. You could use any accent colour fondant you wish instead of orange. Purple maybe? That seems witchy.
Lots of great recipes like this in my books, Recipes from a Normal Mum and The Power of Frozen.
One year ago: Sweet illusion cake, Chocolate collar cake and Maakouda.
Two years ago: Sweet potato and mushroom chilli, Toffee apples, Peach, tea and white chocolate traybake, Milk, tea and honey cupcakes, Chocolate lime pinata cake, Chorizo, kale and roast potato traybake, Quinoa veggie burgers, Thai turkey lettuce cups, Cucumber salad and Blackberry and pear crumble.
Three years ago: Lemon cheesecake, Ginger and Caramac version, Peanut butter pie with an Oreo crust, Double chocolate pecan pie and salted caramel traybake, a Traditional Christmas pud and Parkin for Bonfire night
Four years ago: Chocolate hazelnut truffles and Delicious microwave Christmas pud
Five years ago: Mini Yorkshire pudding canapes, Christmas pudding fizz, Brandy butter icing and my Lemon drizzle secrets
Six years ago: Lime meringue pie with chocolate pastry, Christmas scones, Ginger cake with gingerbread Christmas cottage, Bonfire night treacle toffee flapjack and My festive take on cheesecake
Seven years ago: Moonuts, Cheese biscuits, Parsnip soup and a Steamed cherry and pecan pudding
Ding Dong the Witch is Dead Halloween Cake
Serves 12
Ingredients:
- 1 x 20cm cake
- 1x 250g pack ready-to-roll black icing(to cover the cake)
- 125g unsalted butter, softened
- 250g icing sugar, sieved
- 150mls double cream
- 300g white chocolate, finely chopped
- 1/2 tsp Dr Oetker lime green gel food colouring
- 125g ready to roll black fondant icing (for the witchy legs and hat)
- 1 x waffle cone
- 1.5 tsp Dr Oetker black gel food colouring
- 85g orange fondant icing
- 2 x breadsticks
Put the butter into a bowl and gradually beat in the icing sugar, tablespoon by tablespoon until well combined. Add a tablespoon or two of water to loosen if you wish. Beat for about 10 minutes by hand (or less using a mixer) until light, fluffy and flecked with air bubbles.
Put the bought/made cake (must be cold, not warm from the oven) on a plate or cake stand. If it’s a layered cake then fix the layers together with jam and/or a little of the buttercream icing. Spread the remaining icing over the cake (including the sides) and smooth with a palette knife. Chill in the fridge for at least 2 hrs, until firm. (If you have any buttercream leftover then you can freeze for up to a month).
Roll the black icing between two sheets of non stick baking paper, into a circle large enough to drape over the cake and fit all the ways down the sides. Move over the cake, press down with your hands and smooth to the sides. Use a sharp knife to trim the base and tuck any icing underneath. Then smooth using a cake smoother or yours hands (thought this will given a slightly less uniform finish). Chill in the fridge again. Ensure the cake is well chilled before you begin. (This helps to ensure the drips don’t travel too far down the cake).
Make the chocolate ganache drip icing by scalding the double cream over a medium heat in a saucepan until bubbles begin to form around the edges of the pan. Remove from the heat and leave to cool for 5 minutes before stirring through the white chocolate and green gel food colouring. Stir until all of the white chocolate has melted, then leave to cool at room temperature.
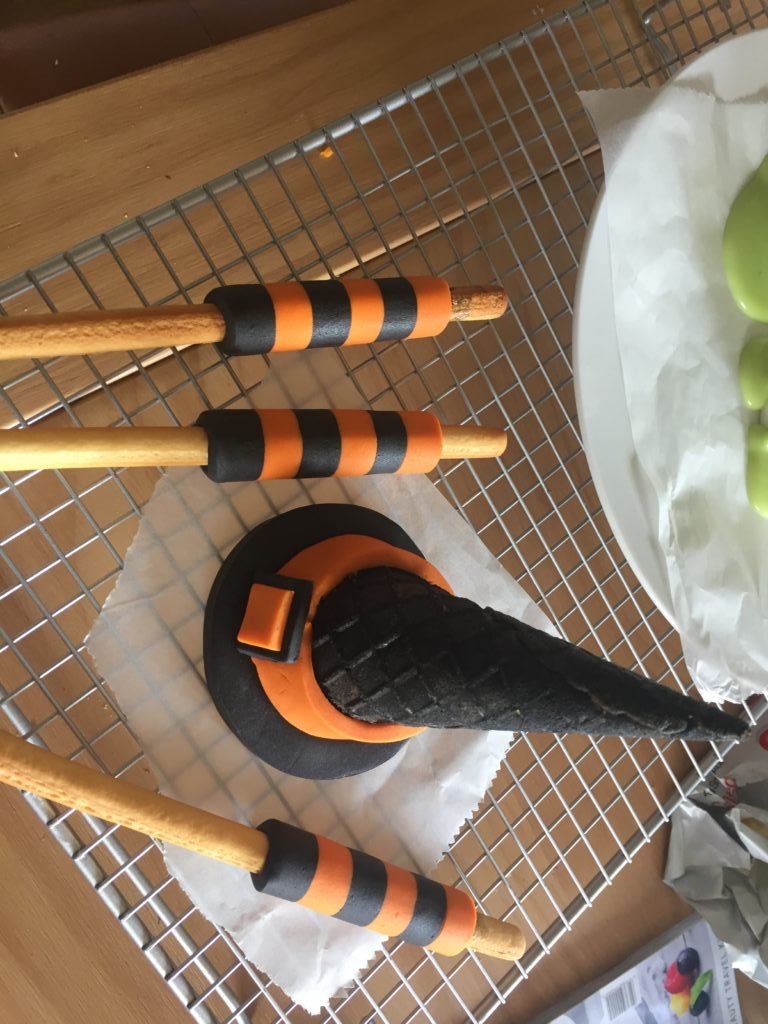
Use a slightly wet pastry brush to paint neat black gel food colouring onto the waffle cone. Leave to dry on a cooling rack protected with non-stick baking parchment.
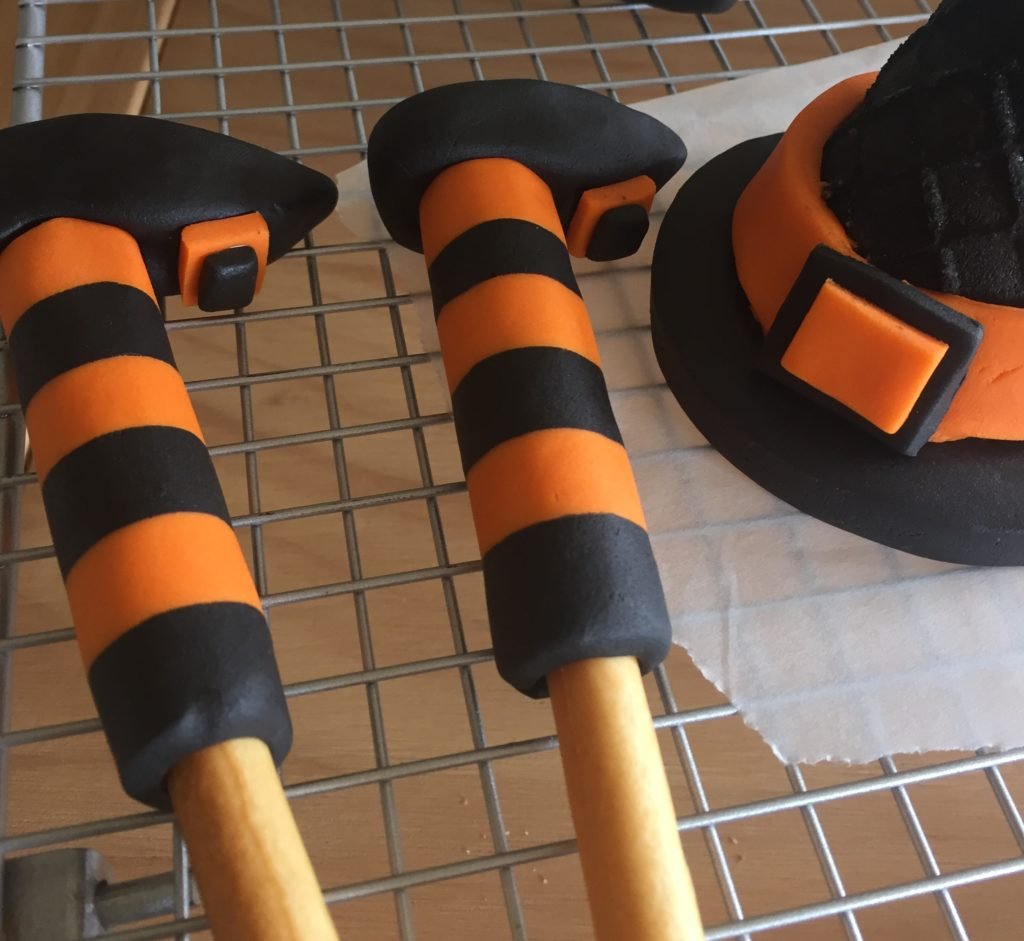
Roll black fondant icing between two sheets of non-stick baking parchment to a thickness of 1cm. Use a circular cutter approximately 8cm in diameter to cut the base of the witches hat. Place on baking parchment, on a wire rack and gently fix the cone into the centre by pressing down lightly. Roll orange fondant icing to a thickness of ½ cm and cut a strip 1 cm x 16cm. Fix around the base of the cone with the join facing the front. Cut a ½ cm square of black fondant 2cm x 2cm as a buckle and fix to the front of the orange band of fondant, using a little water, to hide the join. Cut a slightly smaller square of black fondant and fix this to the orange buckle in the same way. Leave to dry.
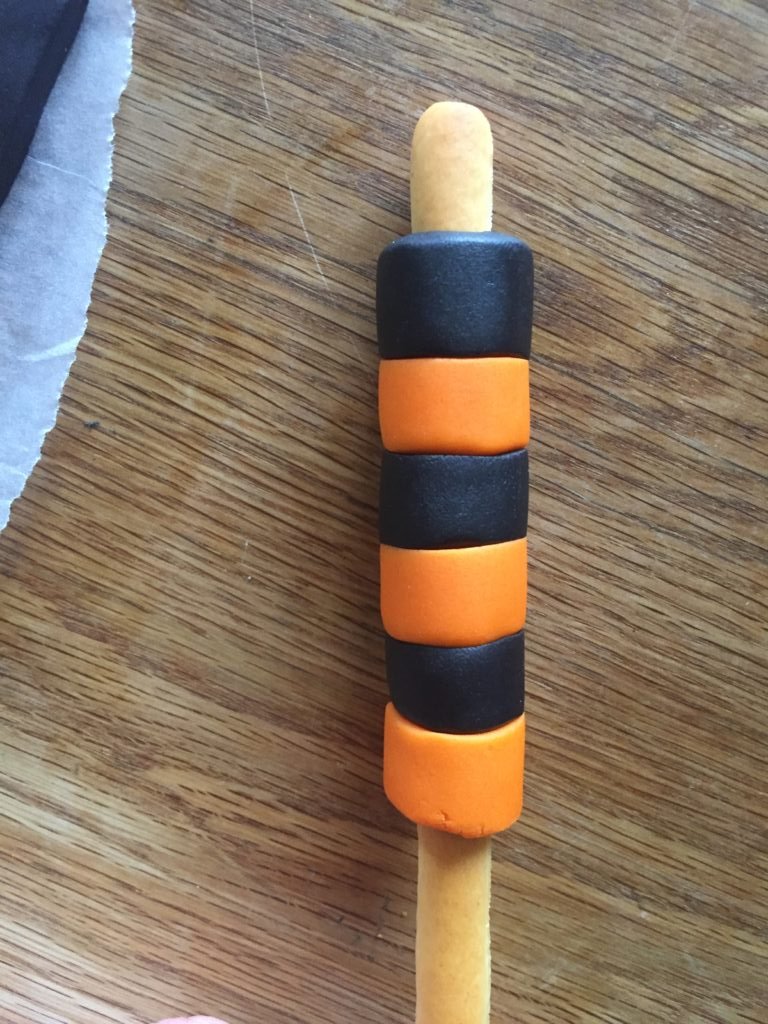
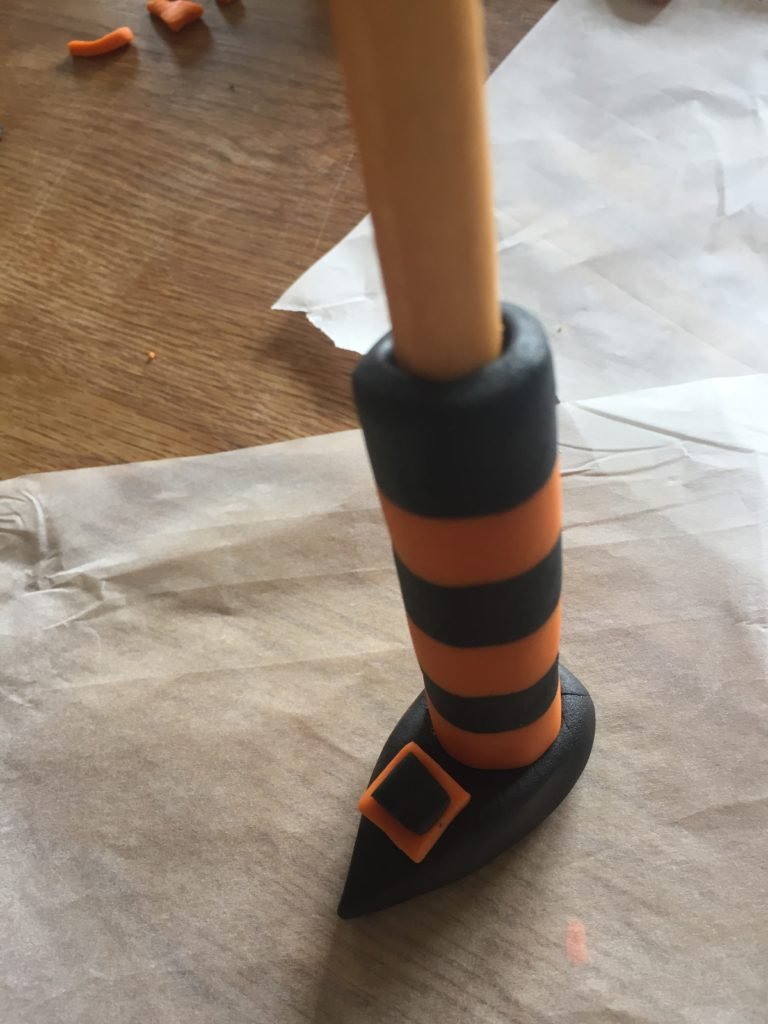
To make the witches legs roll black fondant out, between baking parchment, to ½ cm thick. Cut 6 strips 1cm wide by 10cm long; set aside. Repeat with the orange fondant then place the strips alternately next to each other. Cover with baking parchment and lightly roll to fix the stripes together. Remove the top layer of baking parchment and after wetting the breadsticks a little with water, roll the stripy ‘tights’ around each breadstick, with the orange stripe at the top, leaving 1.5cm free of fondant at the top. Use a knife to cut the fondant to fit. Press gently with your hands and then roll the whole breadstick onto baking parchment to give a smooth finish. Make shoes using black fondant, fix to the end where there’s 1.5cm of breadstick protruding. (The other end of the breadstick will be considerably longer and fondant free; this is to use to anchor the witches legs into the cake). Add a buckle as per the witches hat and fix with water as before. Leave to dry on non-stick baking parchment on a wire rack.


Test the ganache to check it’s ready to pour by using a teaspoon and pouring a small amount onto the edge of the top of the cake (do this on the least well finished side in case it’s still too runny). If the drip very slowly works its way down the cake and stops at the top or half way down then it’s ready. Carefully spoon (or pipe) ganache around the edge of the top of the cake then fill in the top of the cake with more ganache. Leave to set. (You can see in the picture that I rushed this stage and the ganache was not set enough – I had to drive to Countryfile Live so was in a rush).
After an hour use a skewer or chopstick to make holes to push the breadstick end of the witch’s legs into. Add the hat to the other side of the cake and serve.
Tips:
- Be careful not to pour the ganache whilst it’s too warm or it will melt the fondant icing and cover the cake completely – it won’t have any drips!
- Add a little more or less food colouring to make a more muted or vibrant green ganache. Don’t be tempted to use water based food colouring as it will likely split the ganache.
- You can use ice cream curls as legs rather than using breadsticks and fondant. Just be careful when you add the shoes as they can break the curls.
- Leftover ganache? Cover and chill until almost set hard and then form into white chocolate truffle balls. Roll in chopped nuts, sprinkles, popping candy or cocoa.
- You can make Halloween witch cupcakes by piping a cupcake a swirl of buttercream and making shorter witches legs to poke into the top.
- This cake looks great on a large loaf cake too, with lots of witches legs and hats!
- For a Halloween party fill the cone with spooky sweets for a piñata style surprise.

Get the monthly newsletter...
and subscribe to get all recipes straight to your inbox!