
So a couple of things happened. First up I made a vegan soup. I flirted with veganism as a teen and didn’t eat dairy for a whole year, but dolcelatte hauled me back in. It seems old habits die hard though as I often find myself making vegan dishes without even noticing.
Secondly my pal Scott showed me how to use my camera. I am ashamed to say that I have had the camera (you can see what I have here) and my clever lens (look here) and my lighting (look here) and my tripod (here) for some time and have barely used them. (Please note we bought them all second hand – I love a bargain, me). They all scared me. I felt that the lights particularly mocked me. They emulate daylight, so in theory they should be brilliant for shooting food in the evenings and making it look like a bright sunny day. (Having a 1 year old means shooting any food in the day has to be a 10 second affair). But I was so scared of them I preferred to use my iPhone which is embarrassingly Luddite of me.
Scott came over one eve and gave me a 10 minute tutorial in how to take better photos. The reason it was 10 minutes long is because I am not very good at focusing on new things. I am great at focusing on things I know how to do (ahem… take this blog which in blog years is ancient – most folks get bored after about 9 months and give up, resigning their blog to blog heaven/hell limbo yet this one has been going for almost 6 years) but, well, new stuff stresses me out. Especially new stuff that involves cameras. Here’s what Scott told me: how to put the lights up, position the tripod and explained that I should shut all the blinds. You can see the set up here. This is regardless of whether it is day or night. I had to turn all the other lights off too. They are NOT good for photography apparently. The lights were put next to each other as they are pretending to be the sunlight from a bright summer window.
Then he made me turn my camera to the ‘AV’ setting on the left hand dial on the top of the camera. Do not ask me what this means or why – I could have asked but I am not interested. I just want to take nice pictures. Then he explained I needed to play about with the wheel on the top right of the camera that changes the aperture. A low number like 2.2 only gets the bit you point it at in focus and blurs out the back of the photo (and the front if you focus in the middle) – this is what I think David Loftus does. (He is a very famous food photographer who is known for shooting all of Jamie O’s books and lesser known for having shot my first book). If you push the wheel up to the larger numbers like 8, then everything becomes more focused. So you don’t get blurry bits in the background. Obviously there are degrees of this, dependent on how much you push the wheel up or down. Also, if you have low light and therefore the shutter is going to take some time to release you NEED a tripod and a remote or the pic will be blurred from hand shake. This explains why a lot of my photos have been unusable in the past. You need a remote for this – one like this.
I had this horrible feeling Scott would make me use the camera on manual setting which makes me feel a bit sick even thinking about it. He was refreshingly relaxed about it. I did manage a go with it on manual. To focus on manual Scott explained you play with the focus ring (the ring around the lens that moves) until you think the image is in focus. Then press the ‘+’ bit on the display that should let you zoom into the image and check if it actually is in focus. I know this sounds obvious but it had NEVER occurred to me to do this. You zoom back out and then take the picture. You can use the camera on autofocus where it does the focusing for you. The button is on the lens and says ‘AF’ and ‘MF’ and slides easily between the two.
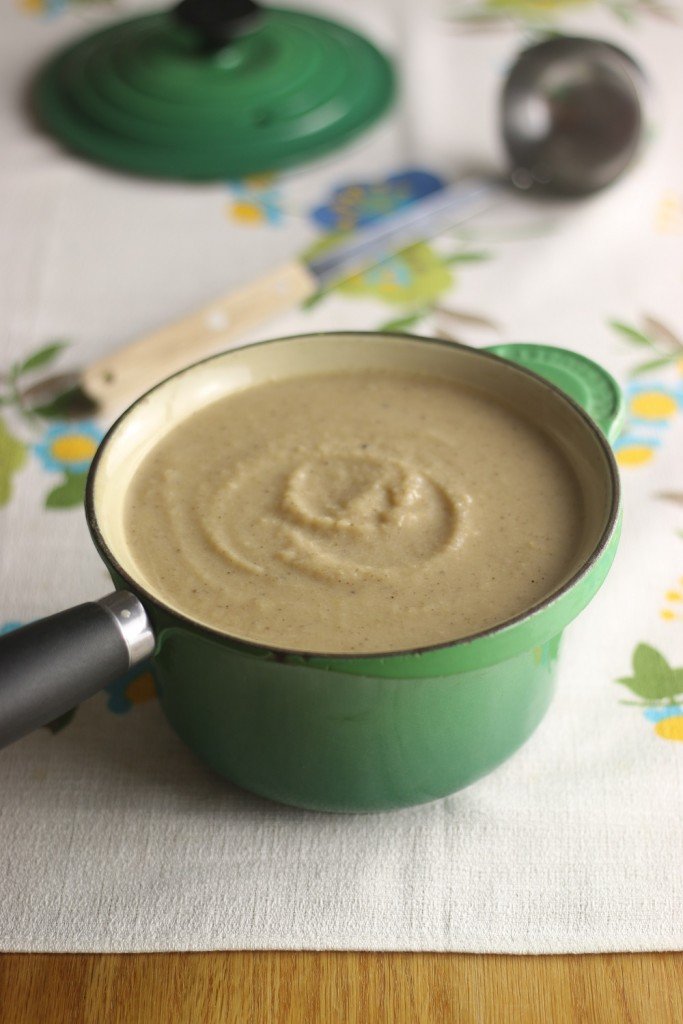
I set up the shot whilst the soup was cooking so that I felt less stressed when it was ready. I took 15 photos to get the one you see above. Usually I take about 50 photos and there’s one that’s passable. This time about 8 of them were okay and one was, in my humble opinion, pretty good. (For me – everything is relative after all). Anyway, I know a lot of you wanted to know what my mini lesson was like and what I learnt so here it is.
I cannot thank Scott enough. He’s a star. I met him only last year when he shot the cover of my second book but he has become a firm friend. He is running a free online photography course at the mo which you can sign up to here. He also runs small workshops face to face – you can see more here. There’s one coming up on food photography. They’re based in Leicester which is 1 hour 10 minutes from London. His work is here if you want to have a look at it.
Onto the recipe!


Prep Time: 10 minutes
Cook Time: 30 minutes
Yield: 4-6
- 715g cauliflower florets broken into 4 - 5cm pieces (this is roughly 1 very large head)
- 5 tbsp olive oil
- 1 tsp freshly ground black pepper
- 2 cloves of garlic
- 5 stalks celery, roughly chopped (about 200g)
- 1.2 litres hot vegetable stock (fresh or using a stock cube)
- Salt & extra pepper to taste
Preheat the oven 200C/fan 180C/gas mark 6. Place the florets into a large roasting tray and drizzle with 3 tbsp olive oil and the black pepper. Give the pan a shake and roast in a preheated oven for 20 - 30 minutes until the cauliflower has charred and the stems are soft. Remove from the oven. (Pls note you can roast the garlic cloves, still in their skins, at the same time as the cauliflower. This is if you like a sweeter garlic flavour. Once removed from the oven you need to squeeze the garlic out into the tray and discard the skins - be careful as the skins are hot. If you prefer a punchier garlic hit then simply add the garlic later on... see below). Whilst the cauliflower is roasting sweat the celery in the remaining 2 tbsp olive oil for 10 minutes over a low heat in a large saucepan until starting to soften. Add the vegetable stock, the roasted cauliflower (once out of the oven) and 2 cloves of peeled and crushed garlic. Bring the pan to a simmer and leave to bubble away with the lid on for 20 minutes. Blend (I use a stick blender as find them best for reducing washing up - those big jug blenders can be a pain to clean) and serve with crusty bread. You could toast a few cumin seeds and throw those on the top, or, if you're not in a vegan kind of a mood, sprinkle with grated cheese.
Lots of great recipes like this in my books, Recipes from a Normal Mum, (available on Amazon, at The Works, Waterstones, WHSmith, The Book Depository and many smaller outlets) and The Power of Frozen (available exclusively in Iceland stores and through their website) which is just £2.99 at the mo! And no, the recipes are not just about frozen food. Every recipe has instructions of how to make with chilled ingredients too.
Last January: Lamb and pea pie on This Morning, Halloumi, courgette and carrot fritters, Crunchy piggy meatballs (also on This Morning) and Granola breakfast muffins.
Two years ago: Lemon & blueberry loaf, my Bake Off Cherry Bakewell inspired cupcakes, plus Sesame bread sticks
Three years ago: Love cupcakes, White chocolate, lemon and macadamia cake and a perfect wintery Roasted celeriac, carrot and parsnip soup.
Four years ago: Bake me not chocolate cake, Jelly and ice-cream meringue roulade, Good flapjack and Banana, butterscotch and fig traybake.
Five years ago: Treasure hunt ice-cream, Rhubarb and ginger chutney and Carrot cake.

Get the monthly newsletter...
and subscribe to get all recipes straight to your inbox!