

I’ve long hankered after making one of those impressive ombre cakes, but if I’m honest the thought of making there different coloured icings and then piping them onto a cake made me feel all tired and in need of a sit down. I’m not a ‘fancy’ baker. I like to think this is a choice, that I could make these amazing creations worthy of patisserie school, but frankly, I’m kidding myself. It’s not my style. I like rustic (aka a bit messy) so this cake is a departure for me. It’s about as un-messy as I get. I hope you like it. I especially hope you like the nifty ruler trick for smoothing the icing.
I made a video with the Scoff folks to show how to make this ombre cake. You can see the vid on my YouTube channel and also the Scoff one. You can watch it below too.
Lots of great recipes like this in my book, Recipes from a Normal Mum, out now… on Amazon, The Works, at Waterstones, WHSmith, The Book Depository and many smaller outlets.

One year ago: Carrot & almond layer cake and Pecan & hazelnut granola and Banana & toffee muffins and Lemon drizzle loaf
Two years ago: Lemon animal biscuits and Oatmeal & fudge cookies and 5 ways with the humble Victoria sponge
Three years ago: Octonauts cupcakes and Walnut, fudge and fleur de sel biscuits
Four years ago: Mutter paneer and Hot cross biscotti
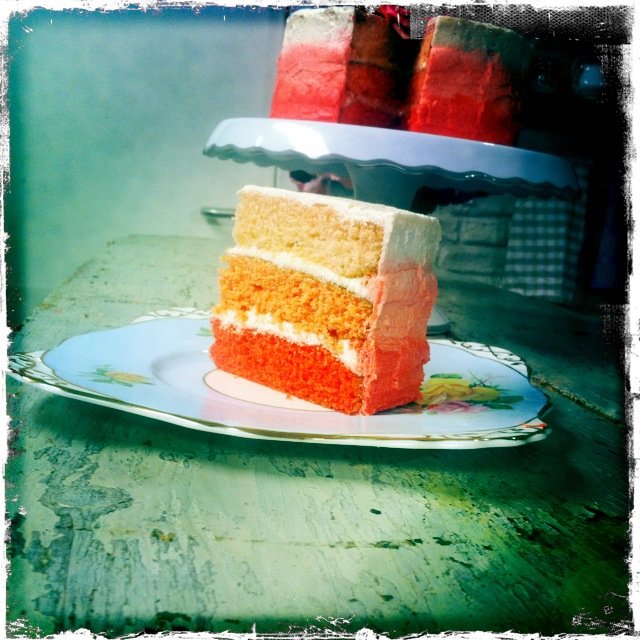
Ombre cake
Ingredients:
For the cake:
• 375g unsalted butter, softened
• 375g caster sugar
• 2 teaspoons vanilla extract
• 6 large eggs. At room temperature
• 375g self-raising flour
• Food colouring – gel colours, not liquid
For the icing:
• 300g unsalted butter, softened
• 3 tbsp vanilla extract
• 3 tbsp cold water
• 600g icing sugar
• Gel colours, as before
Preheat the oven to 180ºC, gas 4. Grease and line 3 x 15cm sandwich cake tins with baking paper.
Beat the butter, caster sugar, vanilla extract, eggs and flour together with an electric mixer until light and smooth.
Divide the mixture into quarters in three different bowls. You can weigh the mixture to do this if you like. Colour each bowl with the gel colour, adding more to each bowl – you are aiming to have one with a very light colour, one a little darker and one very dark. Stir well to combine the food colouring. Spoon the mixtures into each cake tin. Bake the cakes for 20- 25 mins or until a skewer comes out clean. Turn out onto a cooling rack and leave to cool.
To make the icing, beat together the butter, vanilla extract and cold water with a third of the icing sugar for 2 minutes with a mixer until combined. Then add the icing sugar a little at a time, beating well after each addition (be sure to use a low speed to stop the icing sugar clouding up) Once all the icing sugar has been added, beat on high for 7 minutes until really light and fluffy. Divide into 4 bowls equally (you can weigh the mixture if you wish). Set aside 2 bowls of icing and leave them as they are. Colour the other two bowls with gel colours, one darker than the other.
Trim off the tops of each sponge using a bread knife to create a flat, level surface. Put the darkest coloured sponge onto a piece of greaseproof paper on top of a chopping board and cover the top with a thin layer of the plain icing. Repeat with the next darkest sponge and again use the plain icing. Place the lightest sponge on the top.
Spread the darkest coloured icing around the bottom third of the cake using a knife or palate knife. Don’t worry about it looking neat. Use the medium coloured icing to spread around the middle third and then use the uncoloured icing to spread around the top third and also the top of the cake.
Take a clean plastic ruler and hold upright against the cake just touching the icing. Then turn the chopping board in a circle (or move the ruler in a circle but this is slightly trickier) and use the ruler to remove excess icing and smooth the sides of the cake. The resulting sides will show the icing ‘bleeding’ into each other. Clean the ruler and smooth the top to a level. Move the cake to a stand using a cake lifter and then use a regular knife to rough the edges slightly to give it a more rustic look.
Here are a few extra pics of the cake:


Get the monthly newsletter...
and subscribe to get all recipes straight to your inbox!