
The first time I was pregnant, everyone knew within about 2 days of the positive test, and all because I ordered an orange juice. Let me explain.
Thanks to a combination of a very active social life and a decade spent almost entirely on a low carb diet, come 2008 I hadn’t willingly eaten fruit for some time. The grapes that maketh red wine not counting of course. So when I met for a friends birthday 2 days post the positive test I made the school girl error of ordering an orange juice. Fool. Every girlfriend at the table focused on the glass and a chorus of ‘you’re pregnant!’ followed.
So here is my advice to anyone trying to conceal a pregnancy.. Order sparkling water with ice and a slice masquerading as a G & T. Or.. just stay in. Safer.
And just as it is difficult for a former party girl to conceal abstinence from alcohol, this recipe is similarly difficult, mainly because of the number of stages. There’s the notoriously difficult Genoise sponge, a lightly whipped white chocolate mousse, a lemon sugar syrup and last but not least, a homemade macadamia praline crumb. The idea came to me after the people at Nivea asked me to create a recipe so difficult it might actually make people sweat; all for their Nivea Stress Protect Baking Challenge. So here she is, my stressful cake. Oh and don’t forget to keep the cake in the fridge as it contains raw eggs.
One year ago: Bake me not chocolate cake and Joyful banana, butterscotch and fig traybake
Two years ago: Light and sweet carrot cake and Rhubarb and ginger chutney
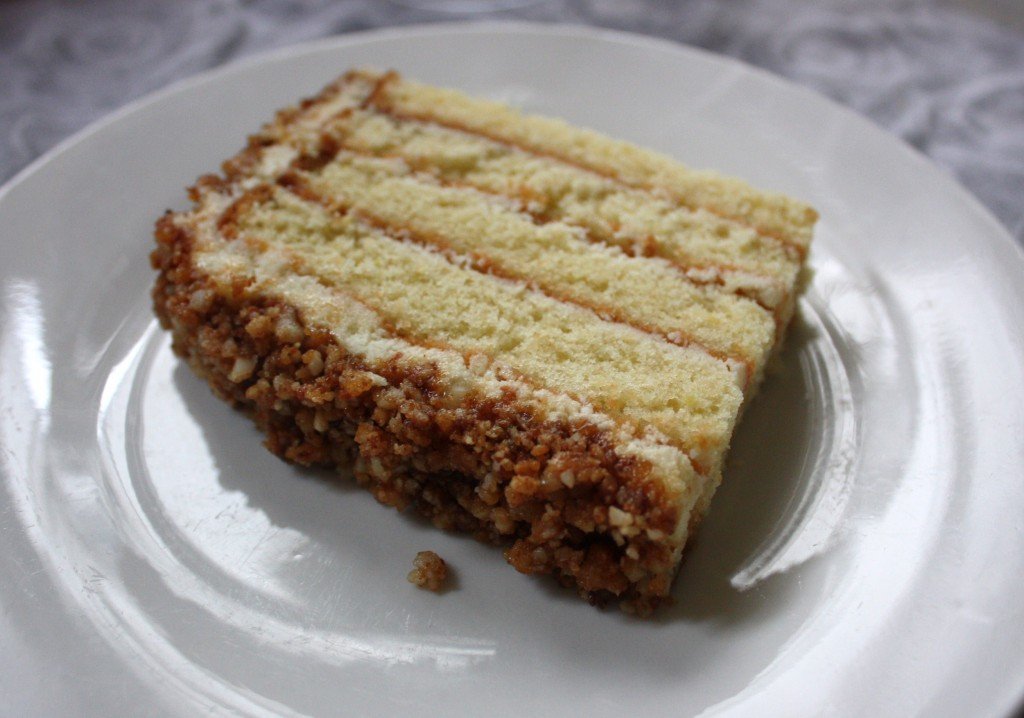
White chocolate, lemon and macadamia Genoise layer cake
Makes a huge cake fit to feed 12 or more
Ingredients:
For the cake:
- 185g caster sugar
- 4 large eggs at room temperature, plus another large egg yolk
- 35g macadamia nuts
- 125g plain flour
- Zest of 2 lemons
- 60g salted/unsalted butter plus a little extra to grease tins
For the mousse:
- 1 sheet leaf gelatine
- 200g white chocolate, broken into pieces
- 45g (about 1.5) egg whites (I use Two Chicks pasturised egg whites if making for children, pregnant or older people)
- 300ml double cream
For the syrup:
- 50g castor sugar
- Juice of two lemons plus cold water to make up to 50mls (cold water may not be required)
For the macadamia praline:
- 165g chopped macadamia nuts
- 165g castor sugar
Stage 1: Make the mousse.
Put the leaf gelatine into a bowl of cold water and leave to soften. Pop the white chocolate into a microwavable bowl and microwave in 30 second bursts until just molten. (Or melt in a bowl suspended over a pan of simmering water, being careful that the water doesn’t touch the bottom of the bowl.) Stir until the chocolate is completely melted and smooth. Set aside, at room temperature, to cool slightly.
Whisk the egg whites (using a hand/stand mixer or a hand whisk) until firm peaks form and set aside. Place 50mls of the double cream in a small saucepan and warm a little on the hob, then take off the heat. Squeeze as much water as possible from the gelatine and stir into the warm cream until completely smooth. Set aside in the fridge to cool.
Whisk the rest of the double cream until stiff then whisk in the cooled white chocolate. Add the gelatine-cream mixture and whisk lightly until combined. Add a third of the egg whites and stir with a metal spoon to loosen the mixture. Then add the rest of the egg whites and fold in gently using a metal spoon until you can’t see any flecks of egg white left. Cover bowl and place in the fridge to set. Don’t worry if the mousse looks a bit grainy at this stage.
Stage 2: Make the Genoise sponge.
Preheat the oven to Gas 4/180C. Check the rack is in the middle of the oven. Grease two cake tins (I used 20cm ones but any will do, adjust the cooking time accordingly. The smaller the tin the shorter the bake) with a little butter and then line the bases and sides with greaseproof paper. Pulse the macadamia nuts, lemon zest and flour in a food processor and pulse until very finely ground.
Take a large saucepan, fill with boiling water and check your mixing bowl fits over the top of it without touching the water, then place the bowl over the top of the pan of water with the eggs and sugar in it. At this point, melt the butter in the microwave or on the hob and leave at room temperature to cool ready for later.
Whisk the eggs and sugar for about 5 minutes (handheld mixer of manual) until the mixture doubles in volume. Remove from the heat and continue to whisk vigorously until the egg mixture has cooled, tripled in volume, and looks like softly whipped cream. This takes about 5 minutes and the mixture should form trails like a ribbon when you lift the beaters/whisk up.
Sift one-third of the nut-flour mixture over the whipped eggs and fold in using a large rubber spatula. Repeat twice more until all the nut-flour mixture has been folded in. Do not over mix or you will deflate the batter.
Then take a scoop of the batter and fold it into the warm butter mixture with a spatula. When completely combined, fold the butter mixture back into the cake batter with a spatula. Pour the batter into the tins, only half way up. Bake until the cake shrinks slightly from the edges of the pan and the top springs back when lightly pressed. The time will depend on the size of your tins but with 20cm size it takes about 20 minutes. Cool on a metal rack, removing the cake tins and paper as soon as you can bear to touch them.
Stage 3: Make the lemon sugar syrup.
Put the ingredients into a small saucepan and place on the hob. Heat until bubbling and then boil for 1 minute. Remove from the heat and leave to cool at room temperature.
Stage 4: Make the praline.
Line a large baking tray with greaseproof paper. Place the sugar in a saucepan and place on a moderate heat until light brown in colour. Add the chopped nuts and swirl the pan until they’re covered in the sugar; don’t stir! Then pour onto the prepared baking tray and leave to set, this takes about 10 minutes. Smash into pieces once set using a rolling pin and then whiz up in the food processor until you have a fine crumb. (If no food processor then you can pop into a plastic bag and use a rolling pin to bash into fine pieces.)
Stage 5: Assemble the cake.
Cut the Genoise sponge into four separate layers using a serrated knife. Position one onto the cake stand/serving plate and secure to the bottom with a little mousse, then brush with sugar syrup and add about 1 heaped tablespoon of mousse and spread into a thin layer, then repeat until the last layer. Coat the whole cake in mousse using a palate knife starting by piling the mousse onto the top and working it down the sides of the cake. Add praline around the side and top of the cake using your hands.
Now sit down and congratulate yourself on not having resorted to alcohol to power you through making this cake.

Get the monthly newsletter...
and subscribe to get all recipes straight to your inbox!