
Sometimes you shouldn’t ask questions in case you get the wrong answers. I once voiced a concern to an ex that I was carrying a good stone too much weight. He went on to agree and tell me in detail about how my back had the potential to look great if it weren’t so fat. That was Fat-Back Gate. Then there’s the time I asked my husband if he liked my semi vegetarian creation ‘Carrot Stew with a hint of Chicken.’ He called for a takeaway. That was and still is Carrot-Stew Gate.
Then I asked the lovely people on my facebook page and on Twitter what kind of brioche they thought I should make for the blog. So many amazing ideas. Many chocolate related. Though here I am posting a lemon recipe. I can only apologise. I somehow think this won’t become Lemon-Brioche Gate. These are that good.
Makes about 12
Ingredients:
1 tbsp castor sugar
3 tbsp water
7g sachet of yeast
1 tbsp castor sugar
Pinch salt
2 eggs
200g plain flour
Zest of 1 lemon
90g soft butter
An egg yolk
I make this in my Kitchenaid but you can make it by hand if you like. It’s very sticky though and hard work. It can be done.
Take the first tbsp of sugar and put in a saucepan with the water on the stove. Heat until dissolved. Then leave to cool a tiny bit until you can dip your finger into it. Then add the yeast and leave for 10 mins until it smells hoppy and beery. It may well be frothy.
Then pour the lot into your stand mixer and add the last tbsp of sugar, give it a mix with the dough hook, then add the salt and eggs, again mix with the dough hook. Then add the flour and mix for about 4 minutes. Lastly add the zest and the mix again – then whilst it’s mixing add the soft butter a teaspoon at a time until it’s all combined. Take the bowl off the Kitchenaid, over in clingfilm and leave on the side for about 1.5 – 2 hours until the dough has doubled in size.
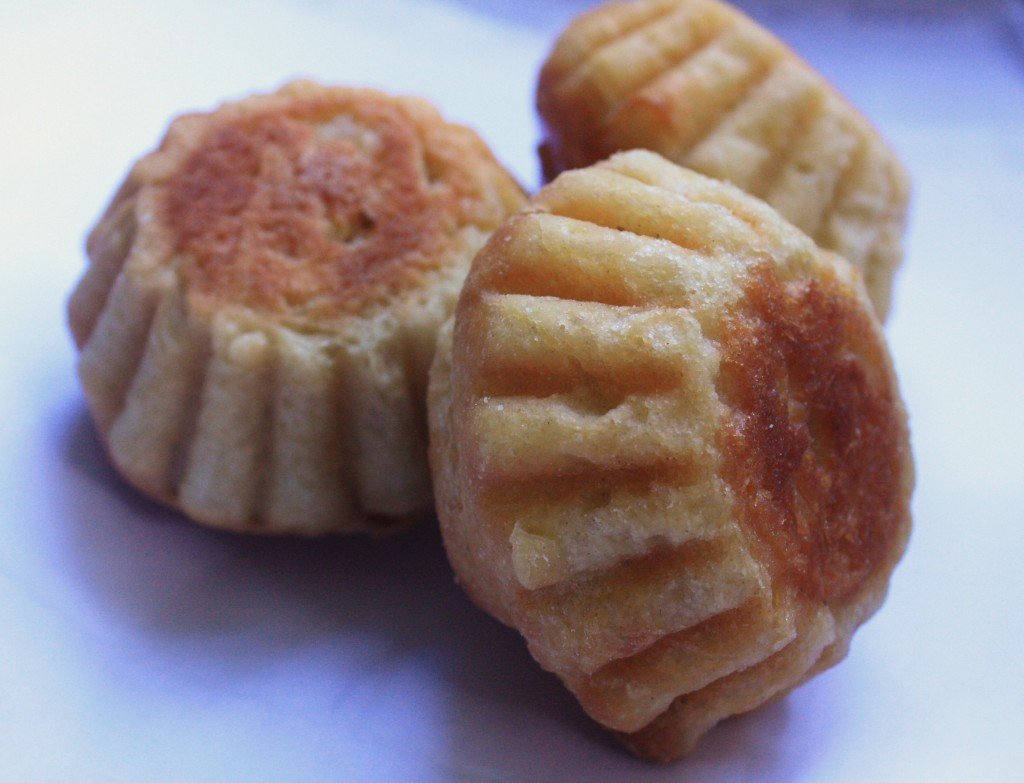
When it has pop back in the mixer and give a 30 second mix to knock the dough back. Then cut into 12 pieces with scissors. It’s very sticky so have a little pot of flour on the side for dipping your fingers into. Then shape the brioche. I do this by taking the piece of dough (ie/ one of the 12) and cutting off a small piece about the size of my thumb nail. This is the bit to go on the top, the kind of ‘nose’ of the brioche. Then I take the rest of the piece of dough, roll in between lightly floured palms into a ball, then put on the work surface and pop a floured finger into the middle and move my finger about in a small circle quite fast to push all the way through until I have a doughnut shape. Then pop this into a buttered mini brioche mould (I use the ones that are about 5cm across from ebay – search under ‘cake moulds) and add the saved ‘nose’ to the top.
When you’ve made all 12, pop on a baking tray and cover loosely with a floured tea towel. (Not a damp one! This lowers the temperature of the air near the brioche as it drys out and makes the rise time too long.) and leave to proof for about another hour or until doubled in size. Paint the brioche with egg yolk and then bake in a preheated 200C oven for 15 – 20 minutes until brown and risen. The kitchen will smell of lemony cake. Eat warm or cold for breakfast. Oh and you can leave the proofed brioche in the fridge overnight, let it come to room temperature and then bake first thing. My boys are rather partial to these as a treat on a Sunday morning.
Adapted from The Ultimate Mixer Cookbook.

Get the monthly newsletter...
and subscribe to get all recipes straight to your inbox!